
2009 Kawasaki Super Sherpa
|
Last Updated: March 14, 2022
|
In the beginning...
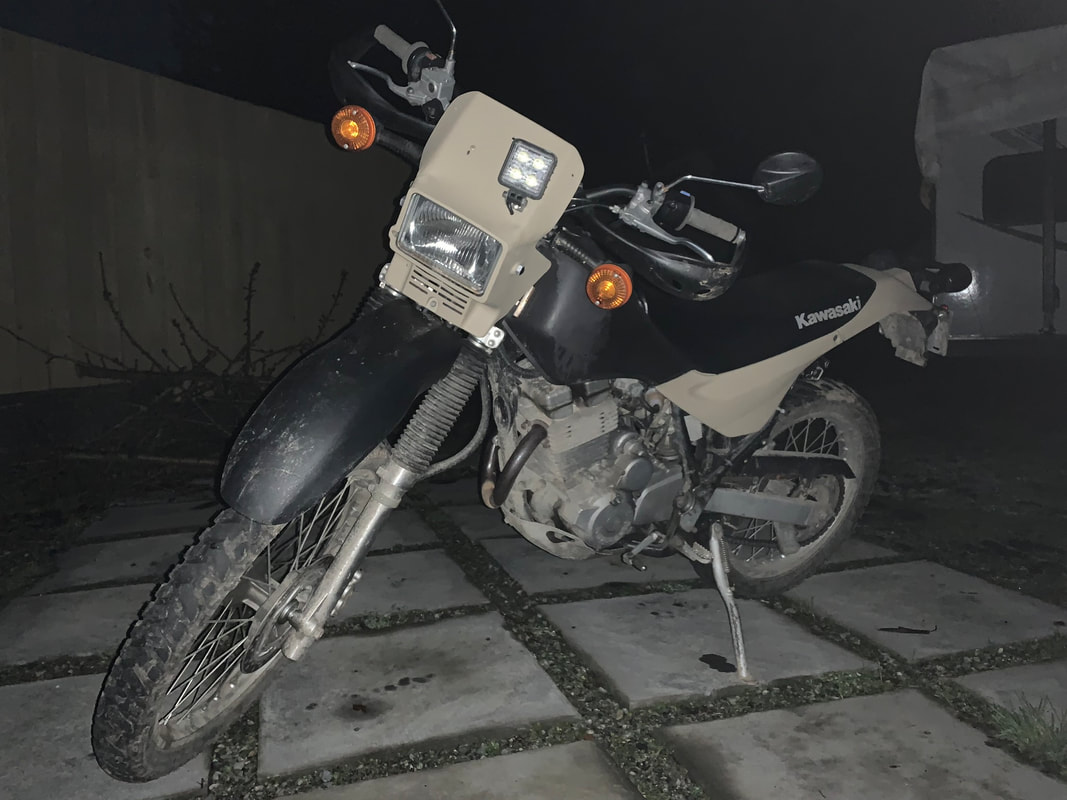
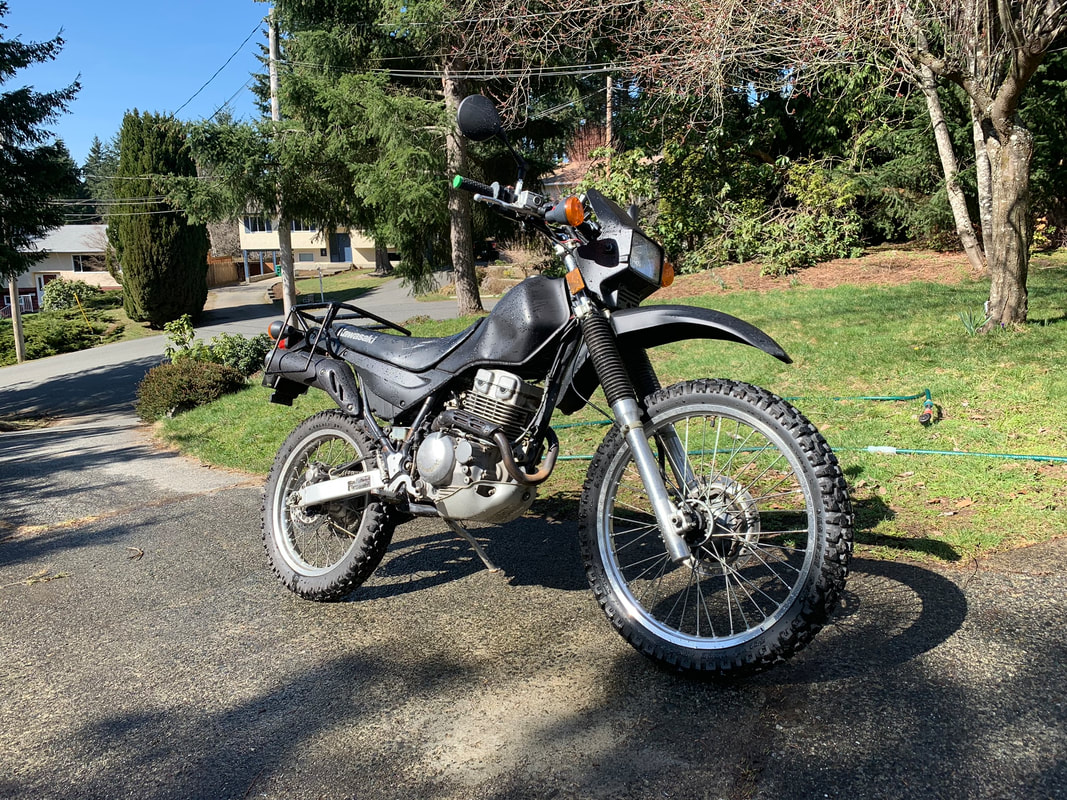
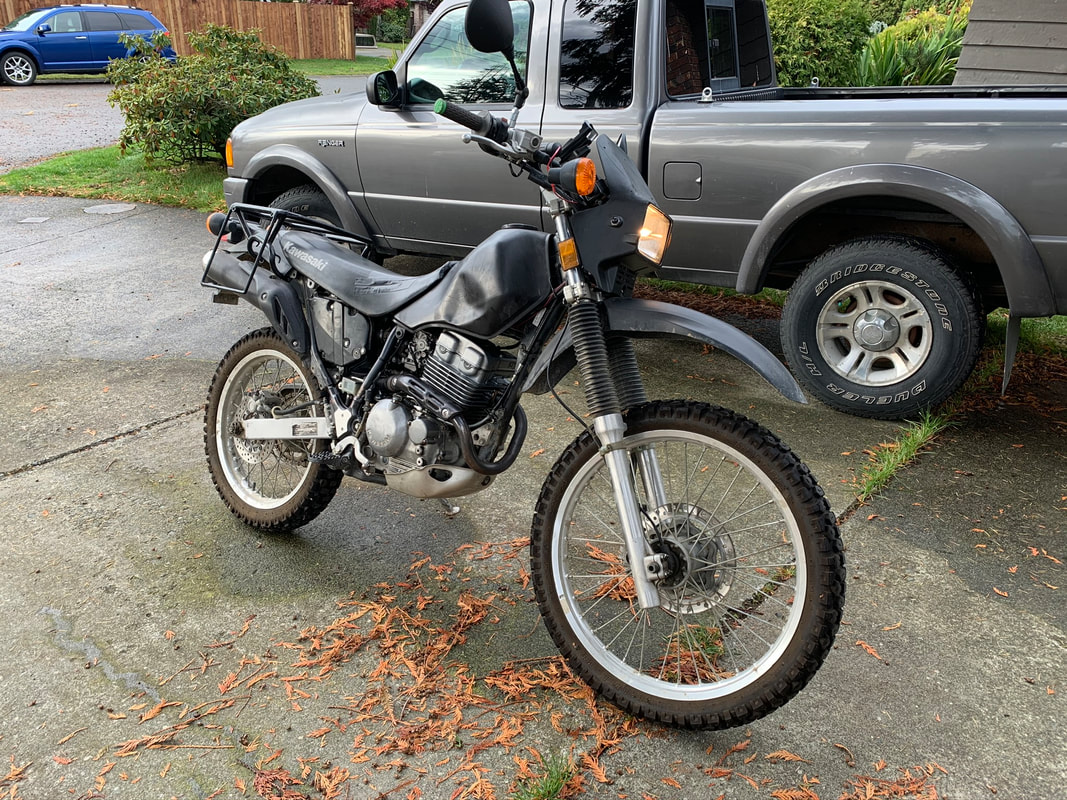
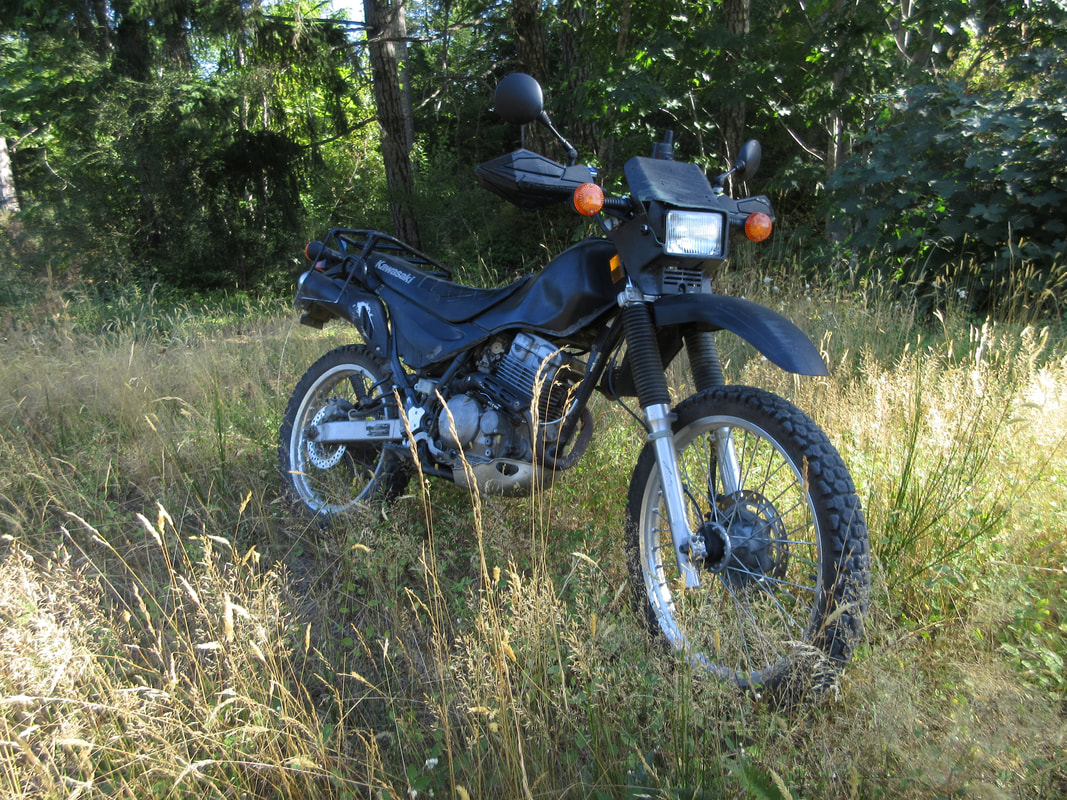
In January 2019 I picked up a battle worn 2009 Kawasaki Super Sherpa. It had very high mileage, 56,000 Km, had some surface rust, was missing some bolts, the tank was dented, the plastics were painted, the stainless exhaust was painted, had a couple rips in the seat, had a puny non-functioning LED spot light & 12 volt cigarette power outlet, with a rusty home made rear rack welded to the grab handles and bent hand guards. In general it was it poor cosmetic shape, pretty ugly looking and definitely wasn't a garage queen! It spent most of it's life as a riding school trainer, then a bush bike.
By just about any reasonable standard I overpaid for the motorcycle, even though it was by far the most inexpensive dual sport I had seen in almost a year of searching the classified ads on and around Vancouver Island - dual sport values just seem to hold so well in BC and on Vancouver Island in particular. But I could see through the first impressions, the motor had excellent compression, wasn't pushing any blue, and everything else more or less checked out mechanically - no bent handle bars and solid steering and wheel bearing with no slop. I judged that with a little maintenance that I could clean it up for minimal additional cost, and have myself a rugged trail bike to compliment my Suzuki TU250X that I had scramberized.
Before I bought the bike, the previous owner had just rebuilt the front forks, and replaced both the sprockets and chain. That was a good start. Let the fun begin!
- replaced both front and rear brake pads,
- bled and cycled out the old brake fluid,
- cleaned and fixed the sticking throttle and clutch cables,
- installed new hand grips,
- replaced the rusted mirrors,
- changed the oil & oil filter,
- changed the spark plug,
- replaced rusted and missing bolts,
- removed, sanded and ground the rust off the tail rack,
- repainted the plastics and rack (result was a decent 10 foot rattle can paint job),
- Gorilla taped the rips in the seat,
- changed the tires and tubes out for Shinko 244s,
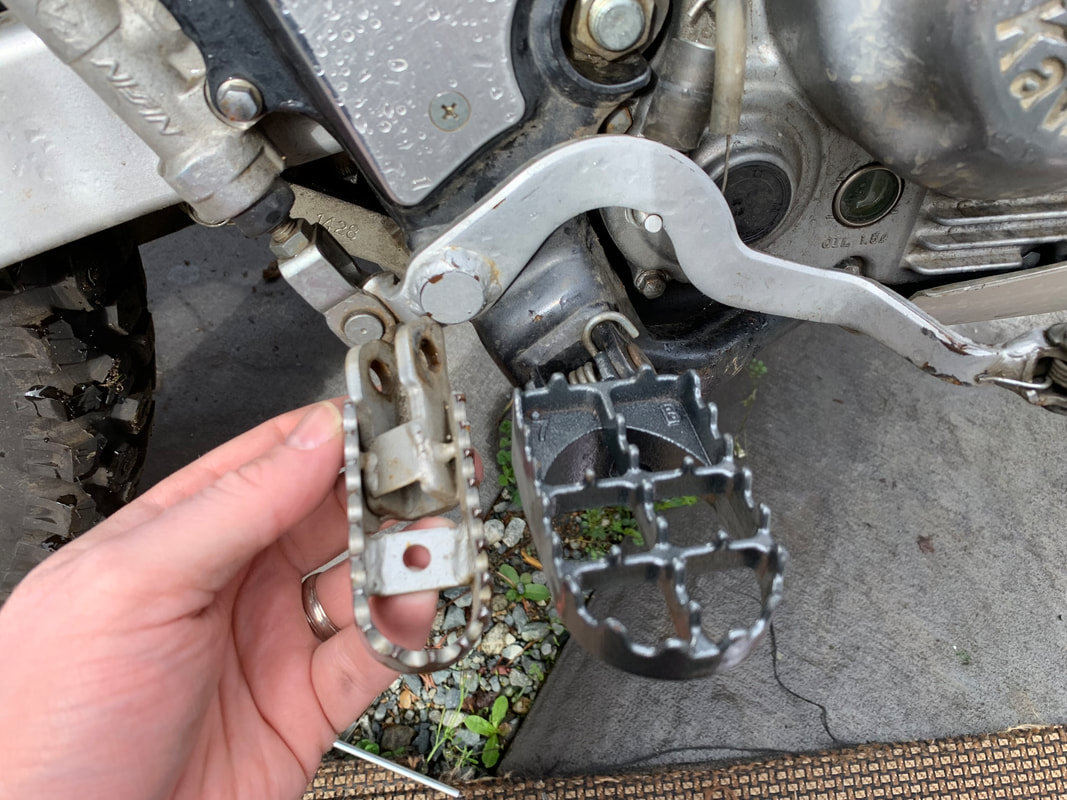
- replaced the foot pegs with nice wide ones for a DR650 that were drop in replacements,
- installed a new working 12 volt cigarette power socket,
- installed a mount for my Garmin.
|
|
July 14, 2019
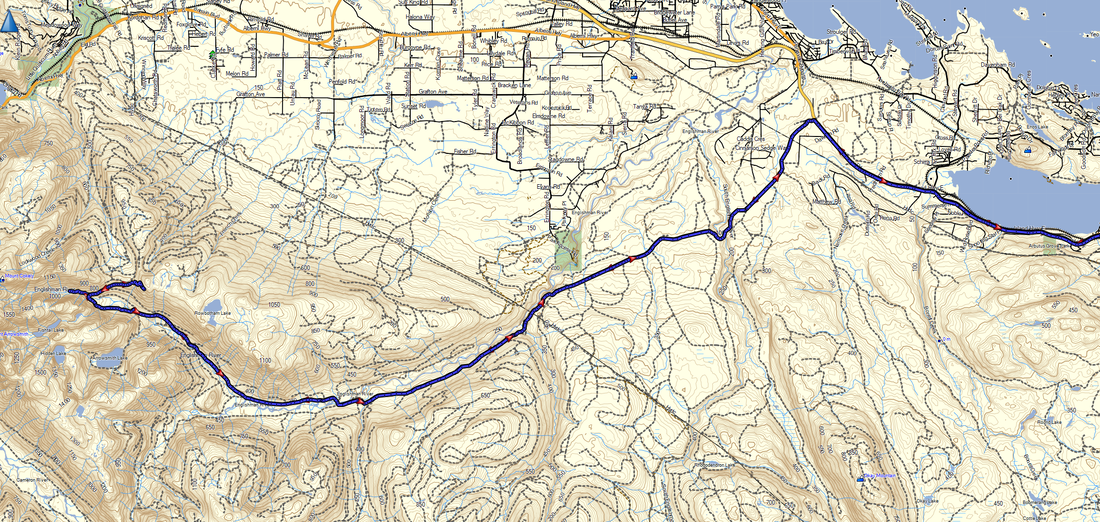
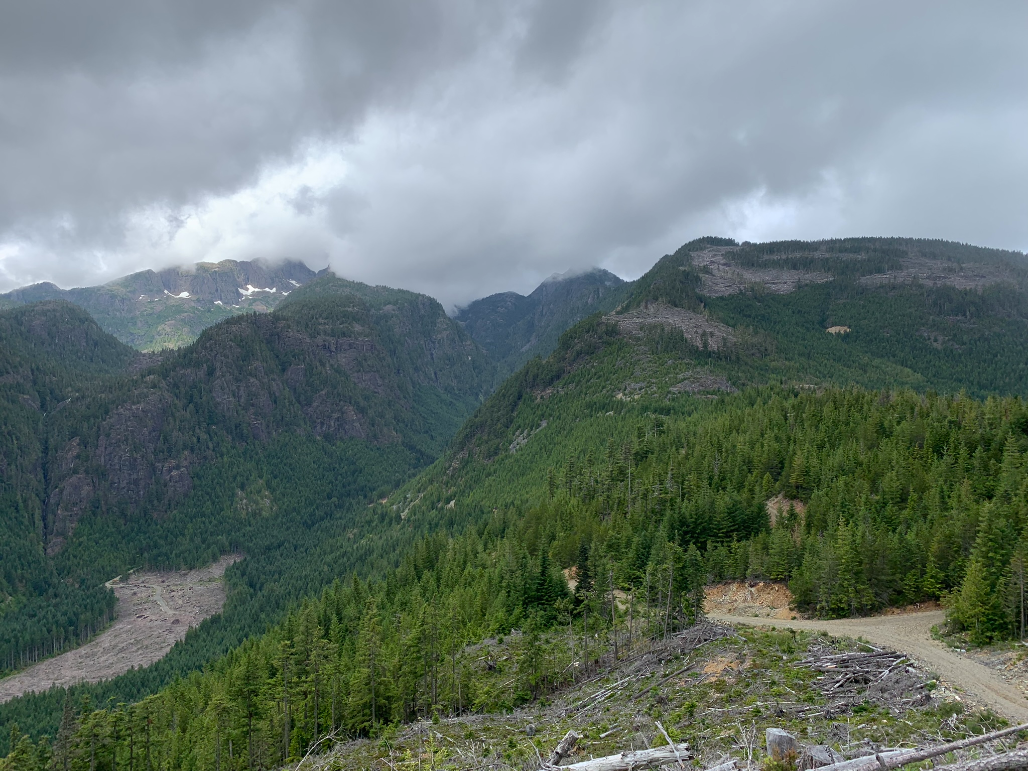
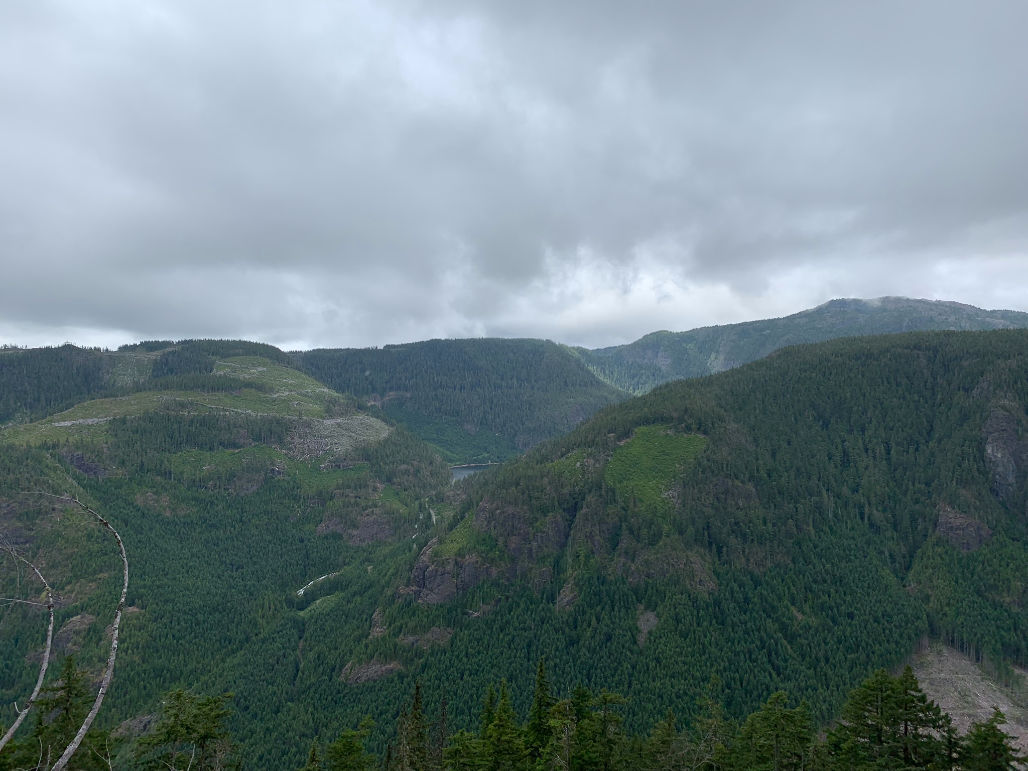
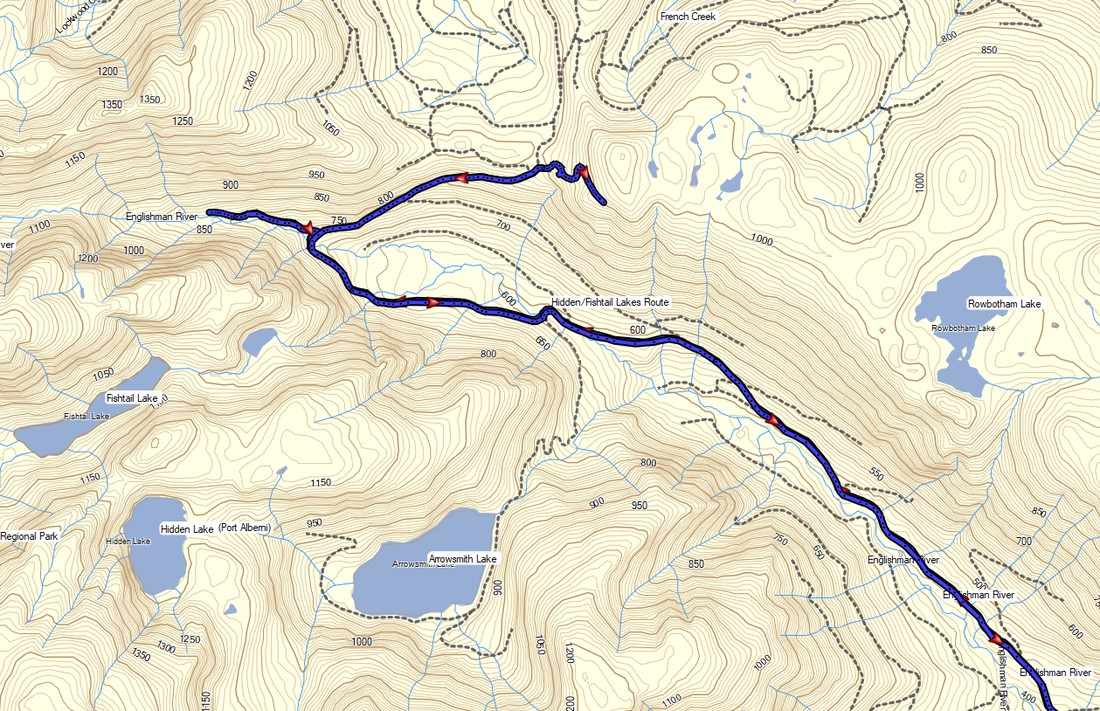
I took a quick run out along Englishman River, scouting along the logging roads following with river until I hit a couple dead ends. The view was pretty awesome climbing out of the river valley. I'll return soon as there are a lot of minor branch roads to explore that will take you deeper into the back country. The last picture has a peek-a-boo view of Arrowsmith Lake from across the valley. I was going to ride up to it, but the road is closed off to vehicles as it is protected being the local watershed and I wasn't prepared for the 2 Km hike straight up! Perhaps another time!
I took a quick run out along Englishman River, scouting along the logging roads following with river until I hit a couple dead ends. The view was pretty awesome climbing out of the river valley. I'll return soon as there are a lot of minor branch roads to explore that will take you deeper into the back country. The last picture has a peek-a-boo view of Arrowsmith Lake from across the valley. I was going to ride up to it, but the road is closed off to vehicles as it is protected being the local watershed and I wasn't prepared for the 2 Km hike straight up! Perhaps another time!


August 3, 2019
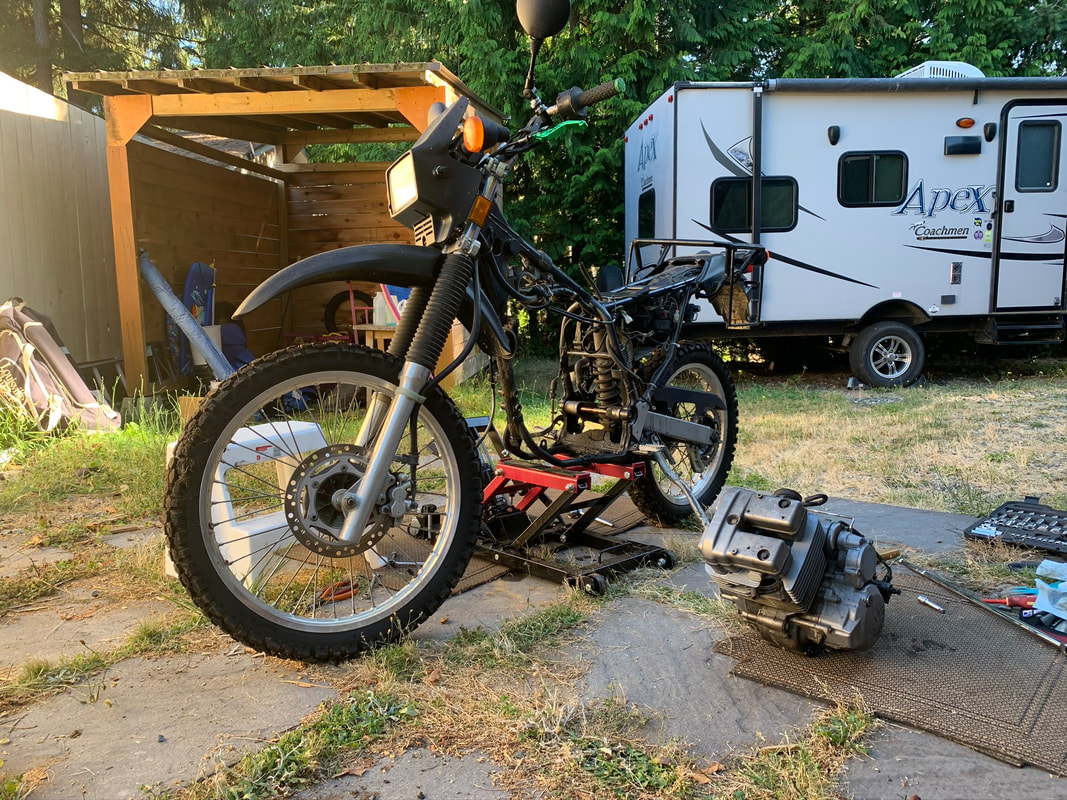
Well that was relatively short lived! I blew up my 2009 Kawasaki Super Sherpa today, after only having owned it since the winter. I was on my way to explore the Campbell River Lakes area, Loveland Bay Provincial Park in particular, when about 30 minutes into my ride from Nanaimo the bike started losing power (not a lot, just a gradual loss) and about 20 seconds later cut off completely. Didn't think too much of the power loss, as I was climbing a minor grade, I down shifted and seconds later it was over.
I coasted over to the side of the road and did the typical quick checks for fuel, air and spark - nothing. Luckily I was only a few minutes past the Qualicum inland highway exit, and was able to be rescued by my dad from Parksville. I don't think I was waiting longer than 30 minutes. We loaded the bike into the truck and took it to his place to investigate.

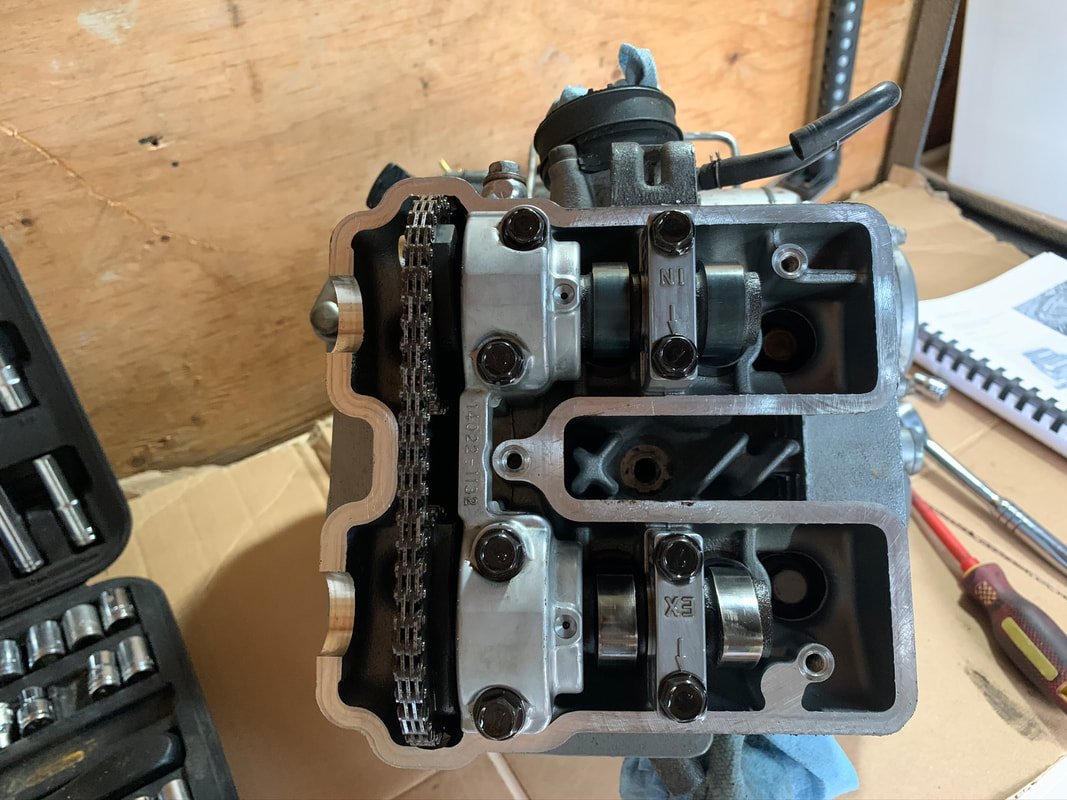
Well that explains it!
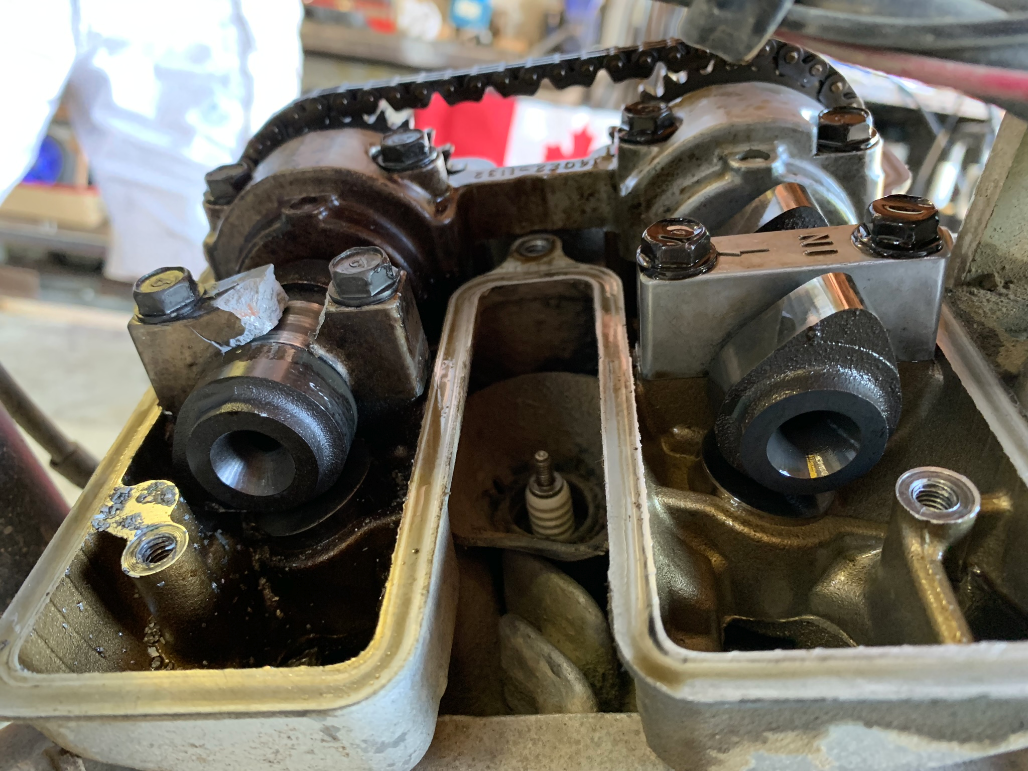
Some nicely bent valves too!
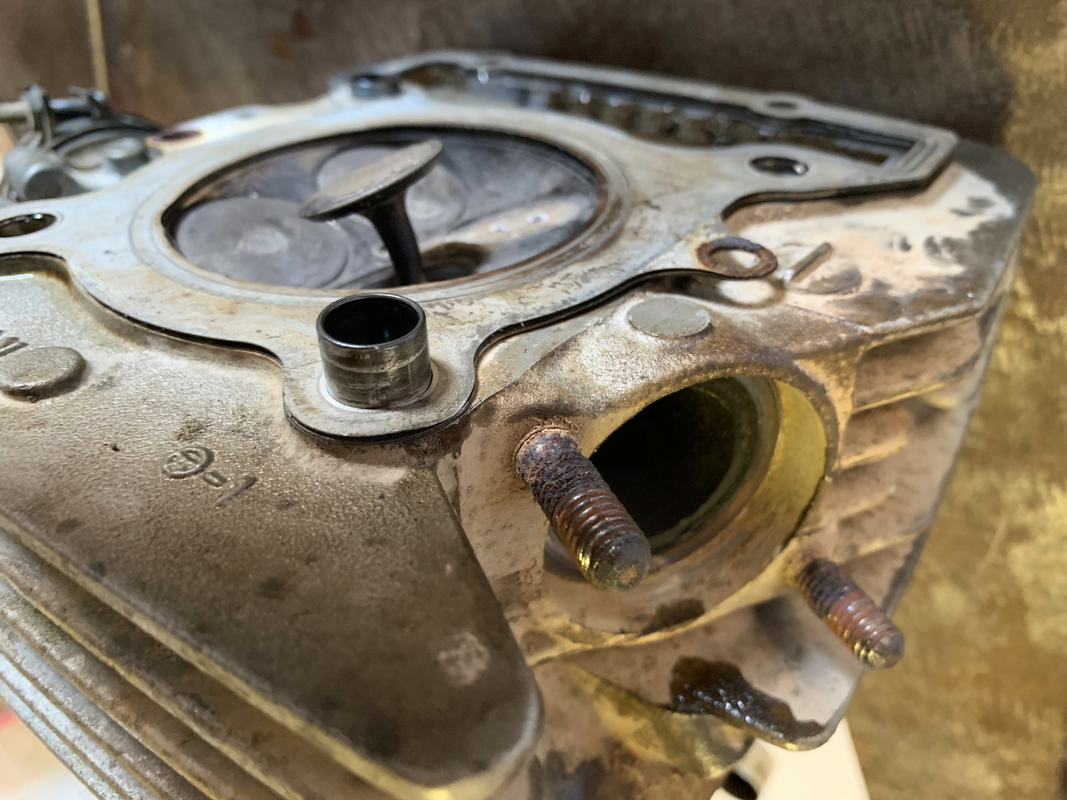
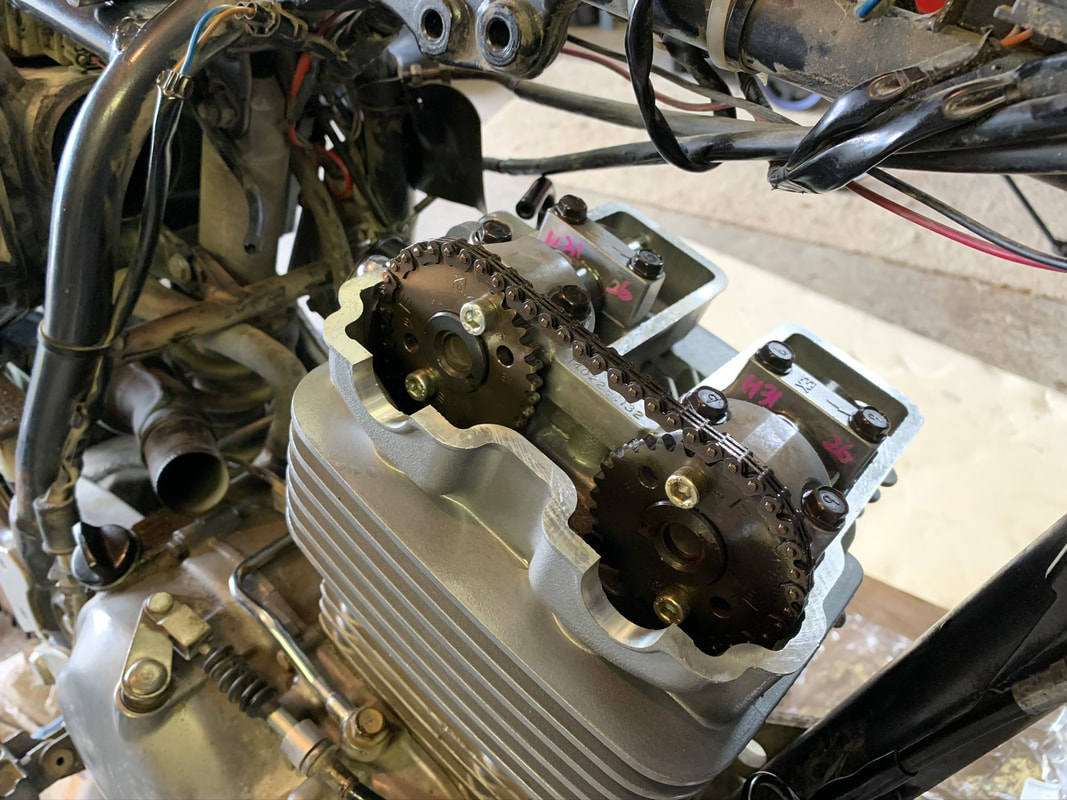
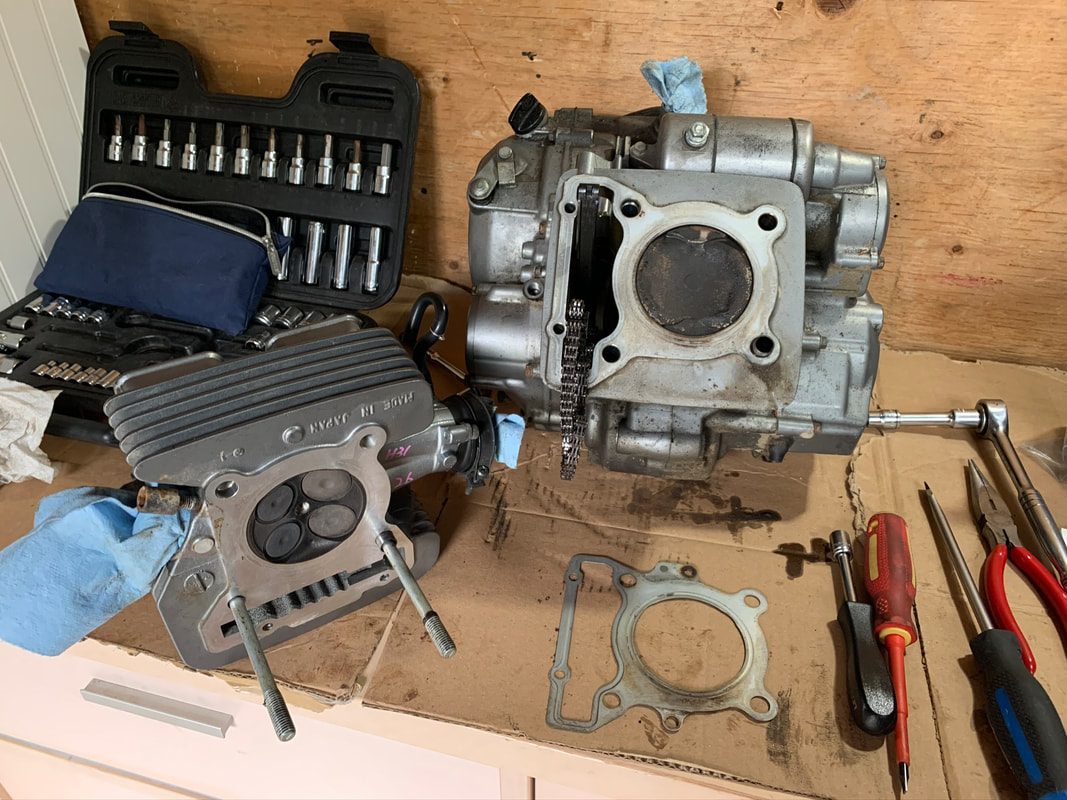
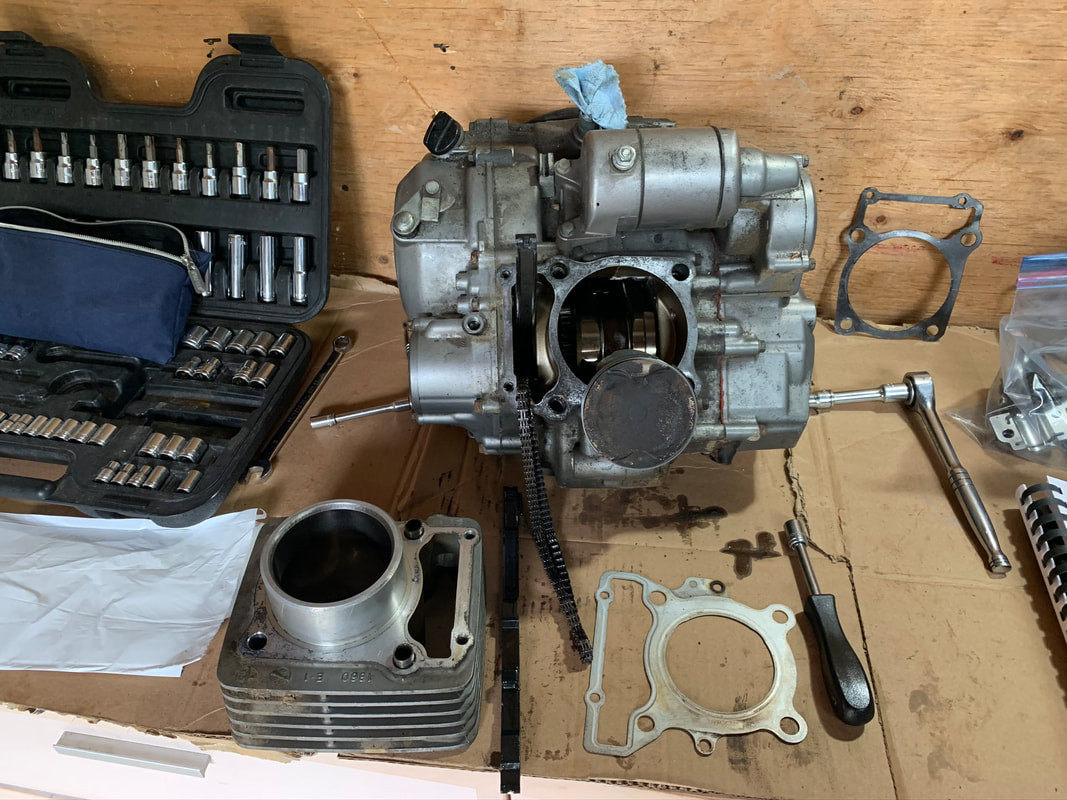
The engine had oil in it, although it was at the lower marker. Still, it looks like the exhaust side was starved of oil and overheated. The cam and journal are shredded and scorched. I took it apart down to the bottom end and the jug and cylinder actually look OK.
So, it's going to need new cylinder head, exhaust cam and valves at a minimum. Parts prices are not looking like a rebuild will be worth it, the bike has 56,000+ Kms on it and it's likely it'll be at least $1,500 USD in OEM parts. Canadian pricing is going to be even worse.
So, at this point I'm thinking of parting the bike out or looking for another and keeping this as a parts bike. Too bad, even though I only had it for a few months, I really enjoyed riding it.
October 20, 2019
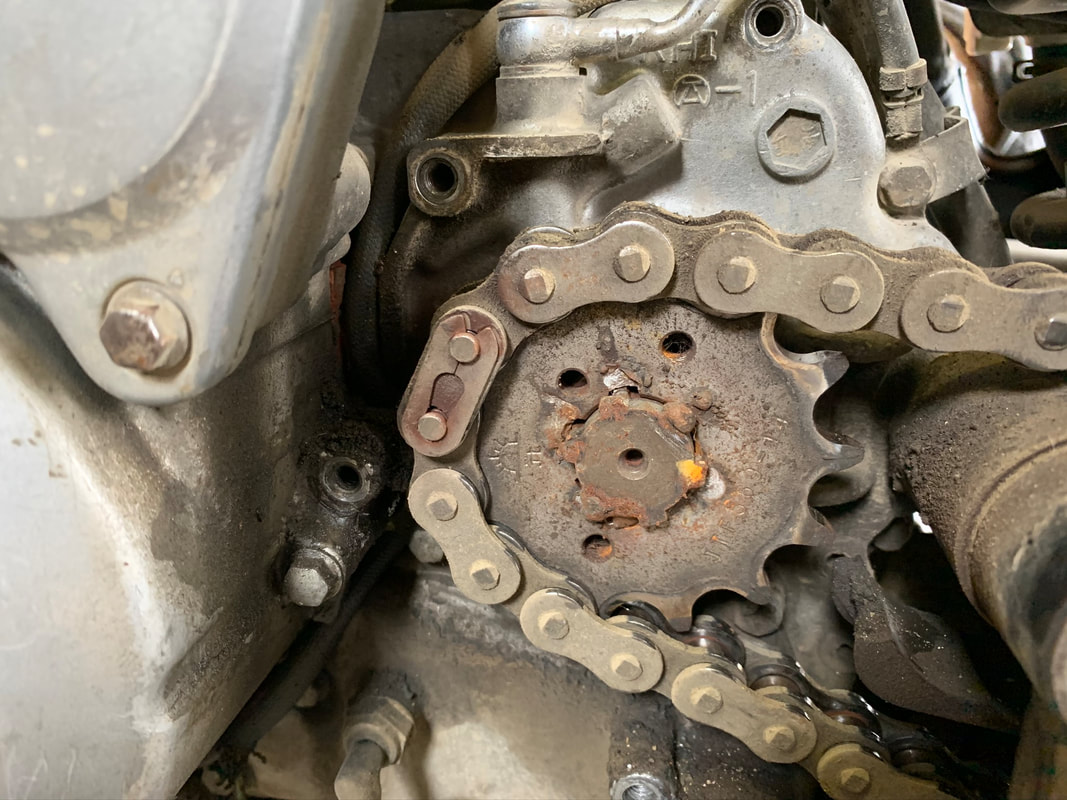
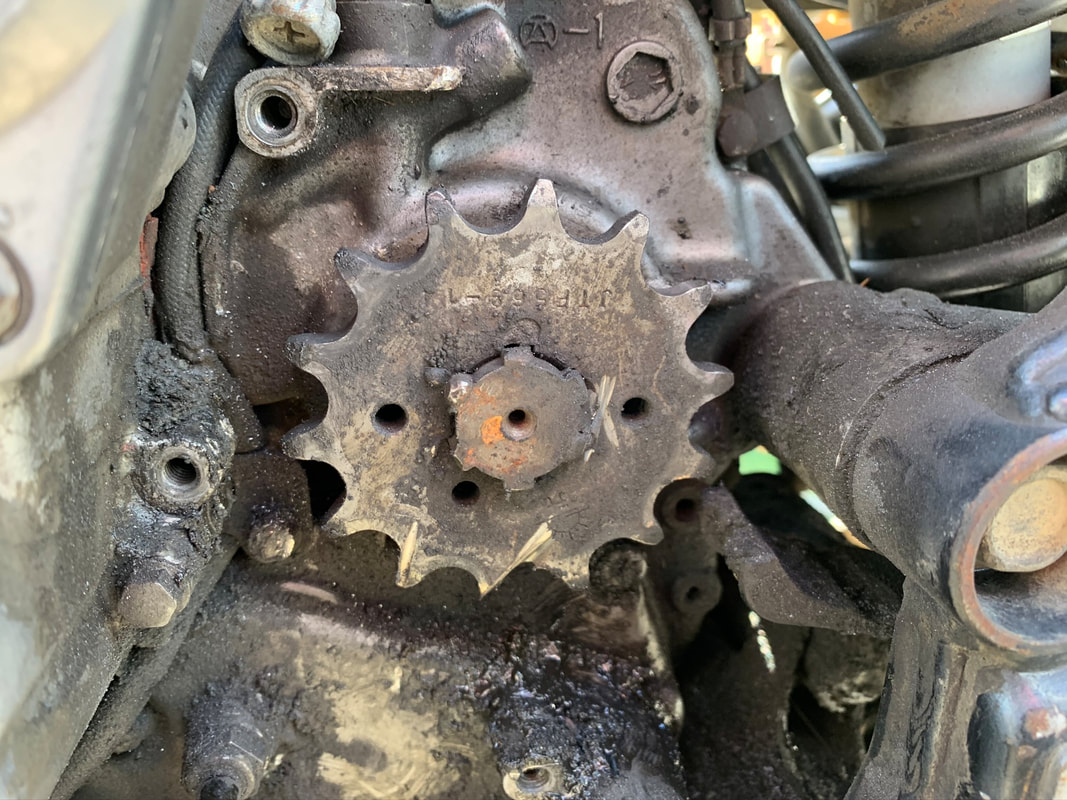
It's alive! The Kawasaki Super Sherpa is back in action. The rebuild went really well and other than the planned pilot jet change (dealer sent the wrong jet) everything went according to plan - except for one very unexpected WTF moment. Based on my previous findings on the bike, such as using a roofing nail in place of a cotter pin on the rear wheel axle bolt which had to be drilled out, I shouldn't be surprised to find such a horrible hack job. I hadn't removed the sprocket cover up to this point, but having dropped a washer down in behind it during the rebuild, I removed it and found this. WTF! The frigger clearly stripped the splines off the crank shaft and his solution to the problem looks like he tacked in some bar stock and welded blobs of snot to hold the sprocket on! I set this problem aside for another day, but I can't stop thinking about it - it's driving me crazy!
It's alive! The Kawasaki Super Sherpa is back in action. The rebuild went really well and other than the planned pilot jet change (dealer sent the wrong jet) everything went according to plan - except for one very unexpected WTF moment. Based on my previous findings on the bike, such as using a roofing nail in place of a cotter pin on the rear wheel axle bolt which had to be drilled out, I shouldn't be surprised to find such a horrible hack job. I hadn't removed the sprocket cover up to this point, but having dropped a washer down in behind it during the rebuild, I removed it and found this. WTF! The frigger clearly stripped the splines off the crank shaft and his solution to the problem looks like he tacked in some bar stock and welded blobs of snot to hold the sprocket on! I set this problem aside for another day, but I can't stop thinking about it - it's driving me crazy!
Beauty! All new bits are installed and ready to go!
- Cylinder head
- Valves
- Valve seals
- Ring set
- Various bolts, studs, spring seats and washers
- Cleaned (but not yet re-jetted) carb
- new spark plugs, oil, oil filter
Right after the top end was all put together, without the cylinder head cover on or the spark plug in and after checking that they were clear of obstructions, I ran the starter with and without the oil line hooked up to verify that oil would pump through all the expected oil orifices.
Arts and Crafts time; making gaskets!

Valve clearances checked and set on the loose end of the range and finally all buttoned up!
The Sherpa fired up first time and is running nicely! Still cold blooded without the #30 pilot jet, but after a nice warm up period I cruised around the culdesac for a few laps, gently breaking the bike in and giving everything a chance to settle. I dumped the new oil after giving it a good opportunity to cycle through the system, and then added another fresh round of oil and new filter. The Sherpa is ready to go home!
I also tried popping out the tank dent with all the tricks: inflating an inner tube as a bladder in the tank, heating and cooling with upside down can of compressed air, and various combinations but nothing worked. The hump in the tank is at such a position that it's really hard and next to impossible to get anything in at the necessary angles. A purpose built bladder would probably do it, but I don't think I'll bother any further and just let the bike look like the Mad Max hack job that it is!
It's been pouring rain the past few days, so I'll wait for nicer weather to take bike out for a longer test ride and the final 30 Km ride from my Dad's place in Parksville back home to Nanaimo. As for the mess on the crank shaft and sprocket...I'll eventually have to replace that crankshaft and sprocket but am not really looking forward to the bottom end work. But I'll do it at some point. Clearly in the future, I won't be buying used bikes at dusk or without taking the darn thing apart nearly to the frame or trusting statements without verifying! Life lessons, am I right? :-S
November 12, 2019
I received the correct #30 pilot jet ordered off of eBay last week and installed it this weekend. The package included 4 x Genuine Mikuni VM22/210 #30 jets for $9! The Kawasaki dealer wanted to charge almost $50 for the wrong one!
I removed the tank and side covers, loosened the intake and exhaust boot clamps, disconnected the throttle cables and turned the carb sideways to access and remove the float bowl from the right side of the bike. I had already replaced the OEM cover and float bowl screws when I rebuilt the top end, so I didn't have to fight with them this time.
Removing the original jet and installing the new one from the right side of the bike was easy with the carb rotated on it's side. I had to blast a bit of WD40 to get the pilot jet to pop out after unscrewing it as I couldn't get it to fall out after rotating the carb back down and I didn't have any canned air on hand. It's nice I didn't have to remove the carb to change the pilot jet and set the air mixture, it's a tight fit in there! I set the air mixture screw to 1 1/2 turns and re-assembled everything back together. All said, it took about 25 to 30 minutes.
The bike fired right up and I was immediately amazed at the difference. The classic 10 minute warm up of sputtering, stalling, and running with the choke on for way too long was gone. It was basically ready to ride right off the bat! Reading about the improvements of a re-jet and experiencing it in person doesn't do justice to how much of an improvement it was! It really is like a different bike for me living at sea level.
Everybody who hasn't already, should do this mod, you deserve it!
March 24, 2020
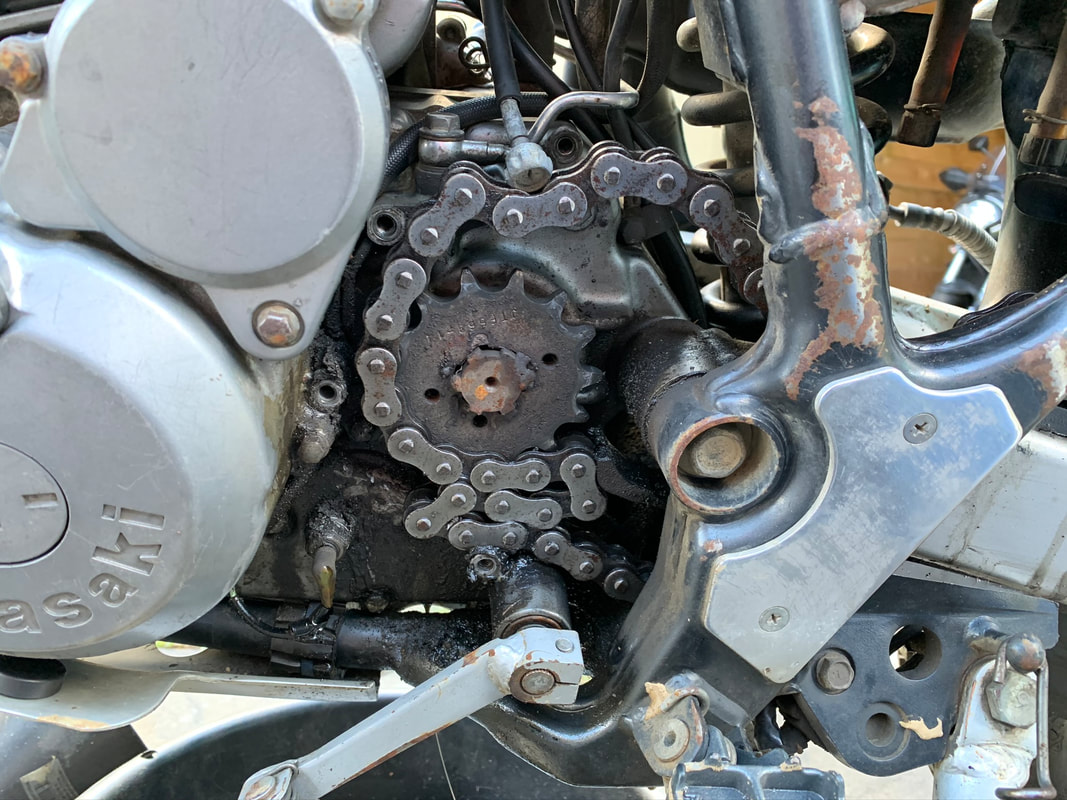
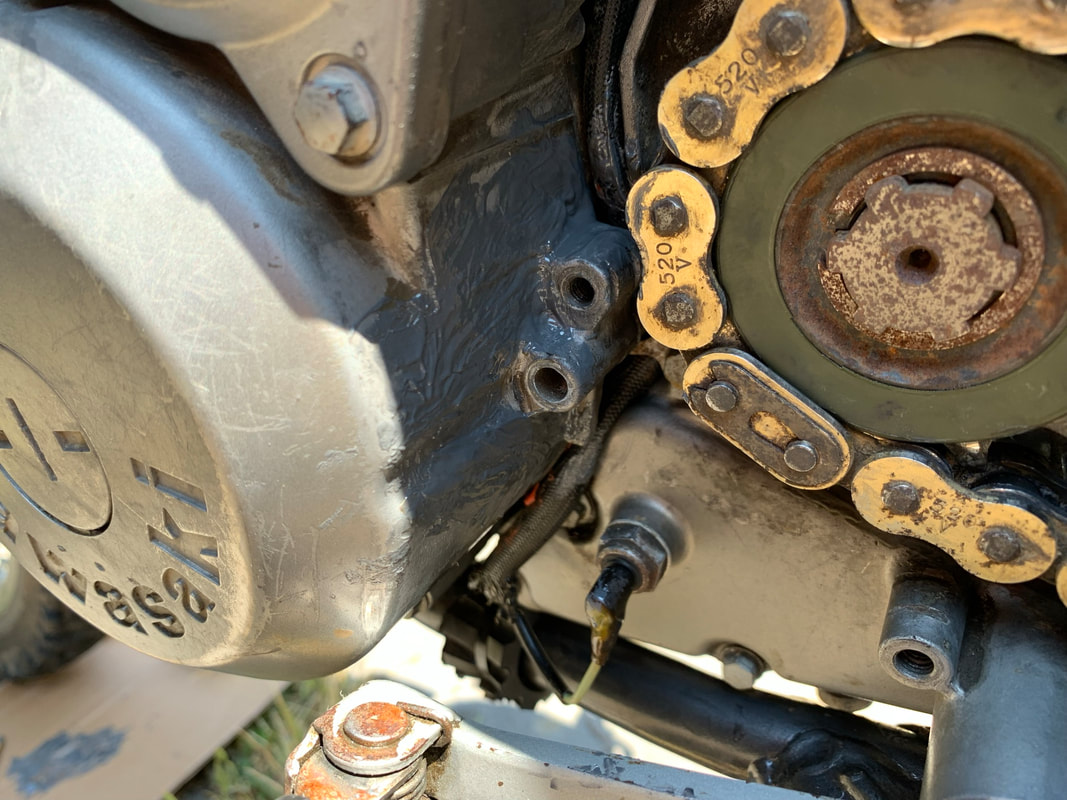
Well, I think my Kawasaki Super Sherpa is cursed. I was puttering around town and on my way home from Departure Bay beach when the master link in my chain broke! And it looks like the counter shaft seal blew out, as oil started leaking. I pushed the bike up past Departurey Bay Elementary school when my rescuer came with the truck and was able to back it up to a bank so I could roll the bike in. Whew! It's a good thing I wasn't in the bush!
Maybe the stupid sprocket weld went, and then the chain and counter shaft seal. The OEM sprocket has a collar that helps to hold the counter shaft seal in. This wasn't the OEM sprocket and it didn't have a collar.
>:-(
So now I get to deal with that stupid welded sprocket on the counter shaft. I knew this day would come. Hopefully the splines are able to be cleaned up and the case doesn't need to be split to replace the counter shaft. Getting a new OEM sprocket, seals, the proper retaining clip (instead of welds!) and chain and maybe it'll be OK.
Since Covid-19 says we're not going anywhere anytime soon, I suppose this is as good a time as any to have another project! And now that I have a new covered space with room to work, it's like it was meant to be!! :-S
I'll take things apart tomorrow night maybe, to see what's what in there.
March 29, 2020
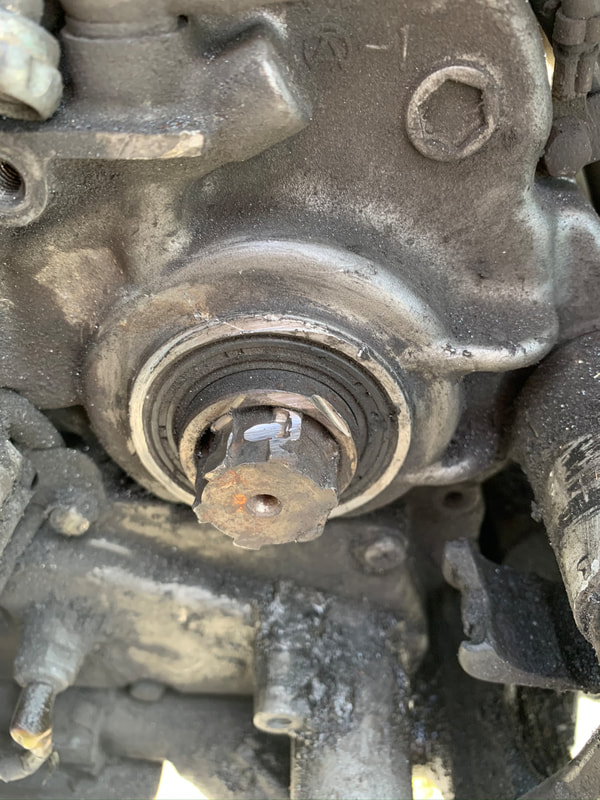
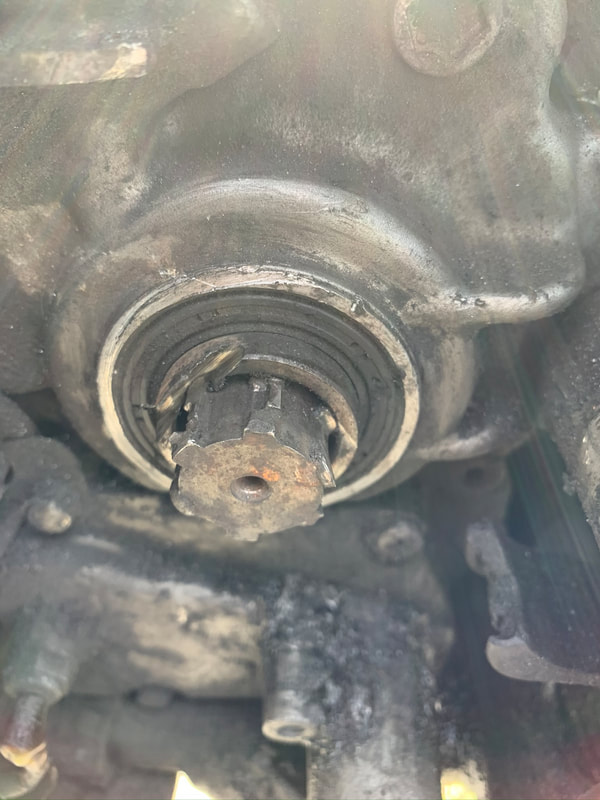
The chain and sprocket were jammed in tight, both had to be cut out with a grinder. The weld did break on the sprocket which is probably what caused this mess to begin with.
The chain and sprocket were jammed in tight, both had to be cut out with a grinder. The weld did break on the sprocket which is probably what caused this mess to begin with.

Blobs of welding snot remaining on the splines, the sprocket wobbles and shifts on the counter shaft, and the counter shaft splines were a mess after cutting the sprocket off (you can tell they were messed up even before my hatchet job.)
|
|

|
So at a minimum, I need a new counter shaft, counter shaft seal/collar, new front and rear sprockets, chain and retaining clips (instead of welds!) to get the drive train functional. It might be time to cut my losses and part the bike our or sell to someone who will be interested in splitting the cases to do the work.
August 15, 2020
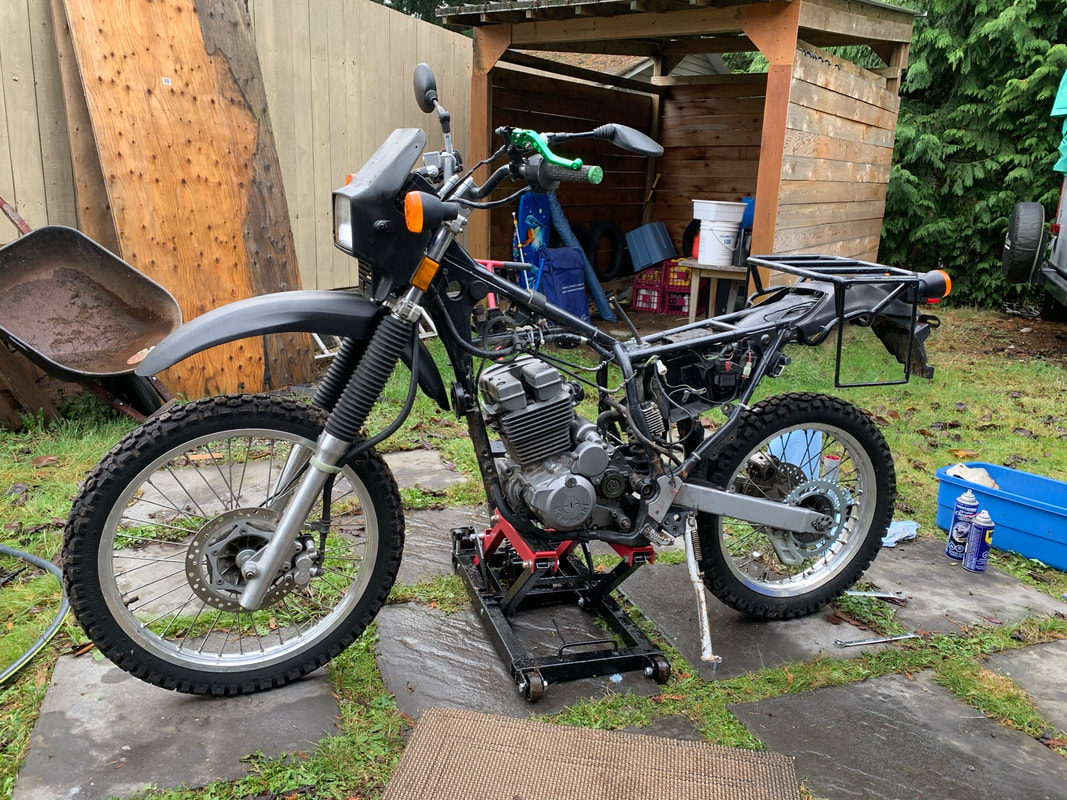
After contemplating what to do for a few months, I decided that I would take the plunge and replace the counter shaft. First things first, remove the engine!
After contemplating what to do for a few months, I decided that I would take the plunge and replace the counter shaft. First things first, remove the engine!
September 15, 2020
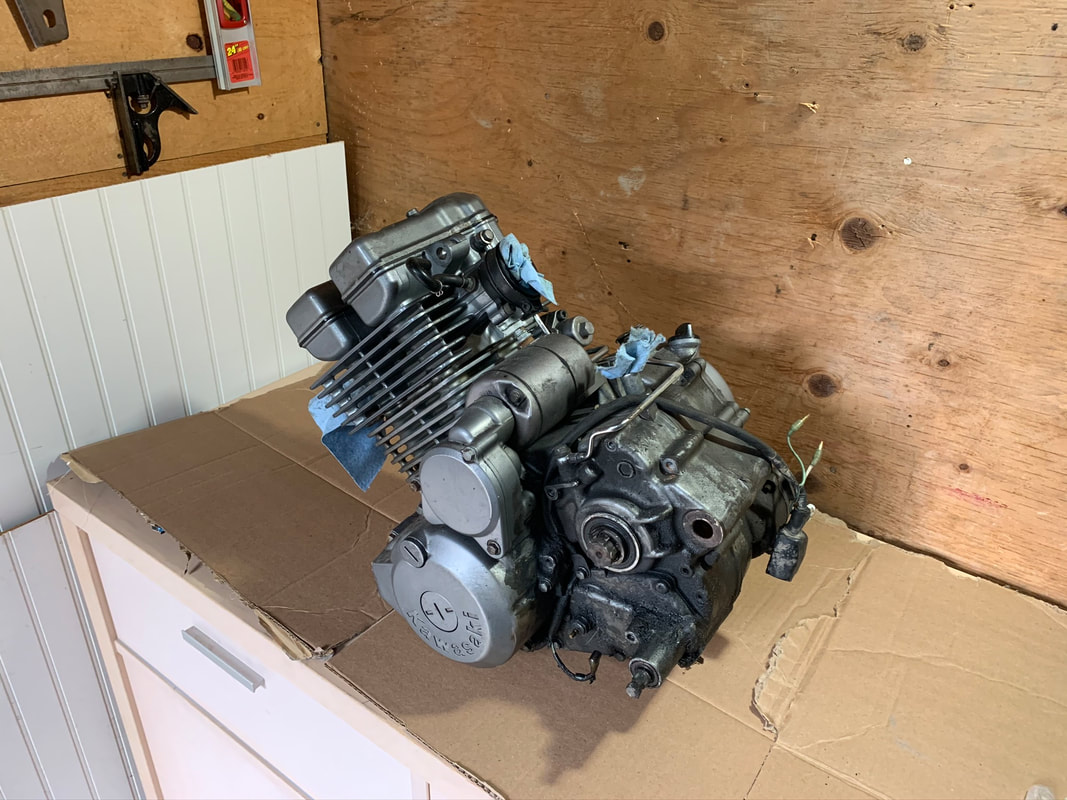
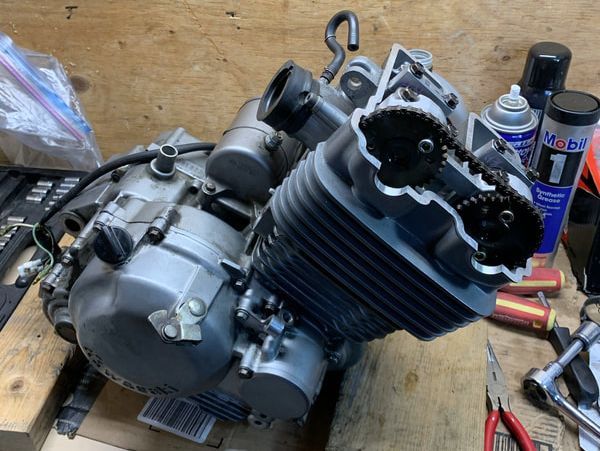
After admiring the engine sitting on my work bench for a month, I figure it was time to start digging into it to see what's what in there.
After admiring the engine sitting on my work bench for a month, I figure it was time to start digging into it to see what's what in there.
|
|
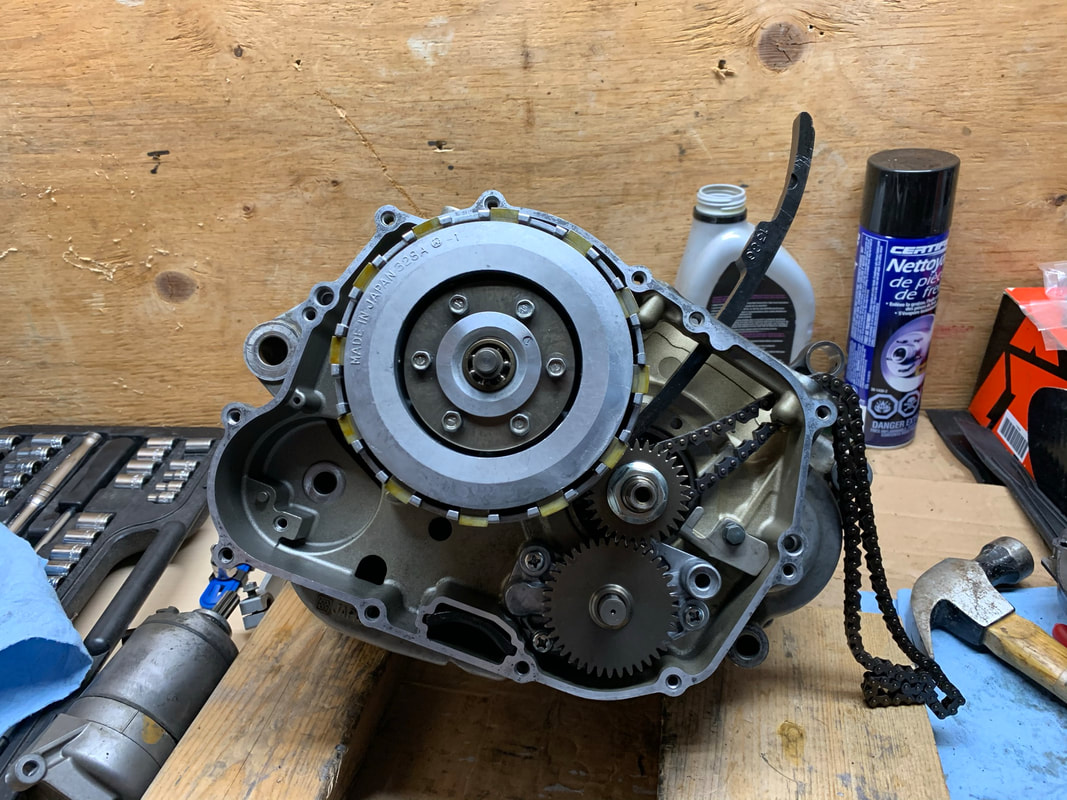
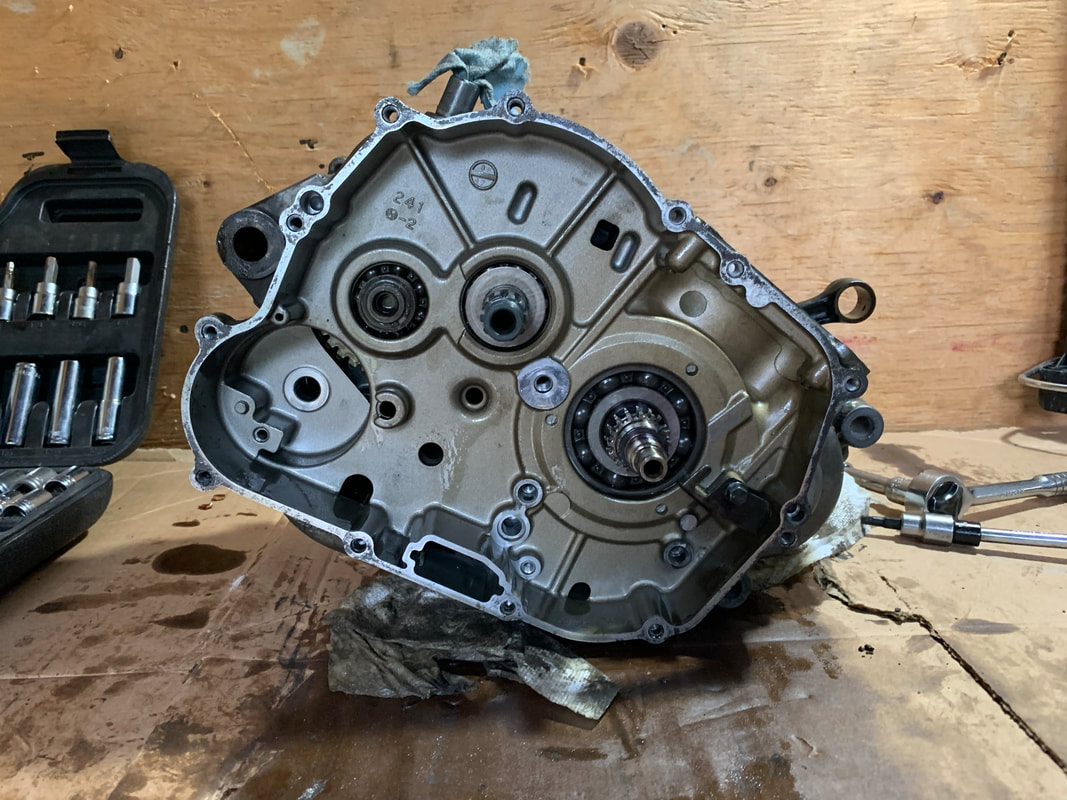
With the top end is off, it's time to get to the side cases.
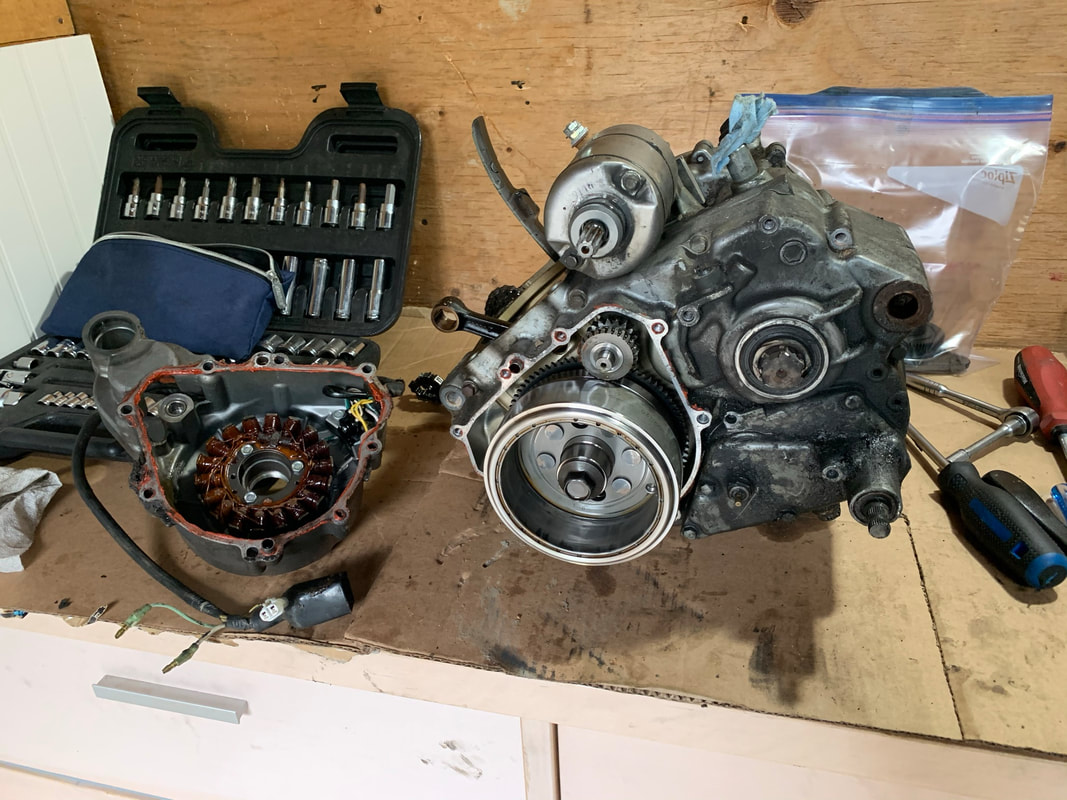
What a frickin' mess! RVT is everywhere! Inside the alternator case, on the gears! Gah! Who ever was in here before (...finish this sentence in your head!!)
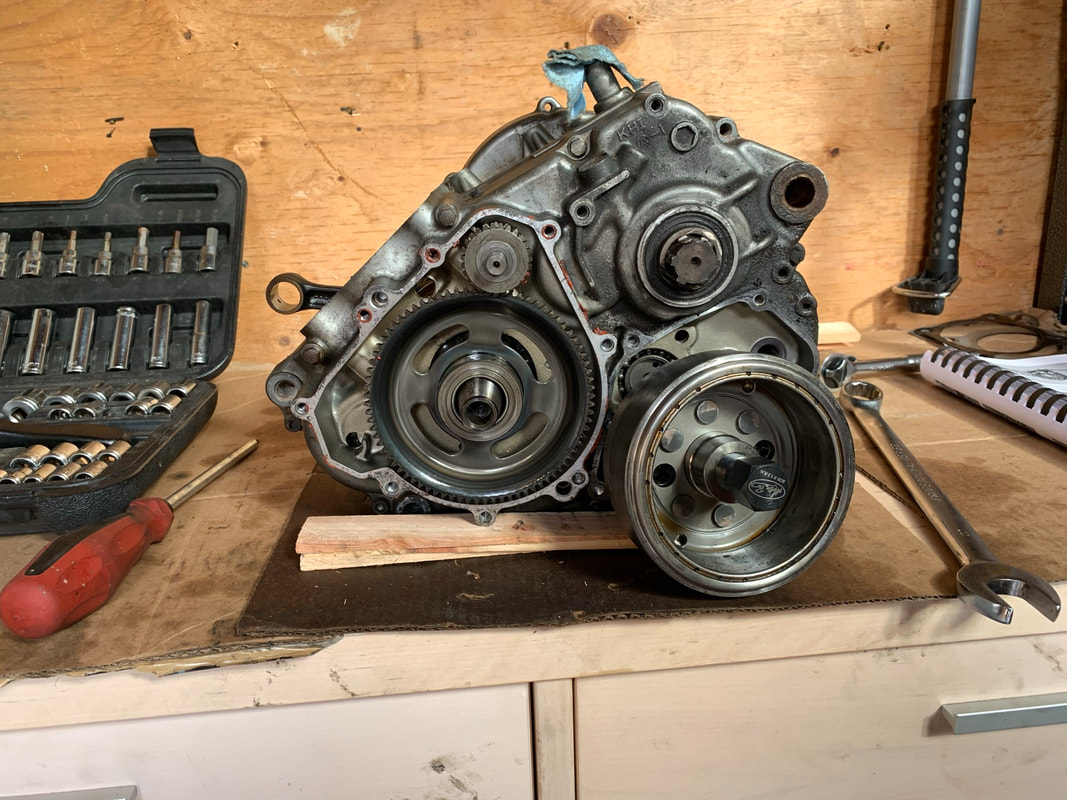
The flywheel was a treat to get off, needing an extra pair of hands with a shreeve tool to hold it from spinning while cracking the bolt loose.
The flywheel was a treat to get off, needing an extra pair of hands with a shreeve tool to hold it from spinning while cracking the bolt loose.
|
|
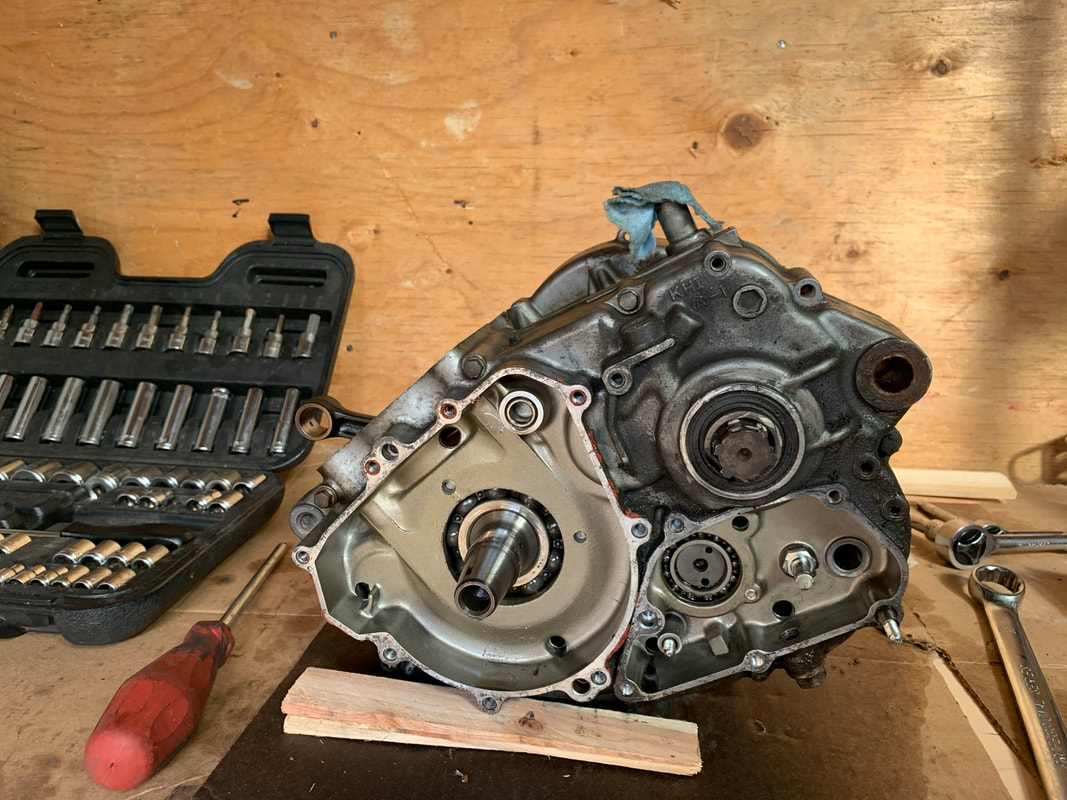
Clutch and Cam bits next!
|
|
October 14, 2020
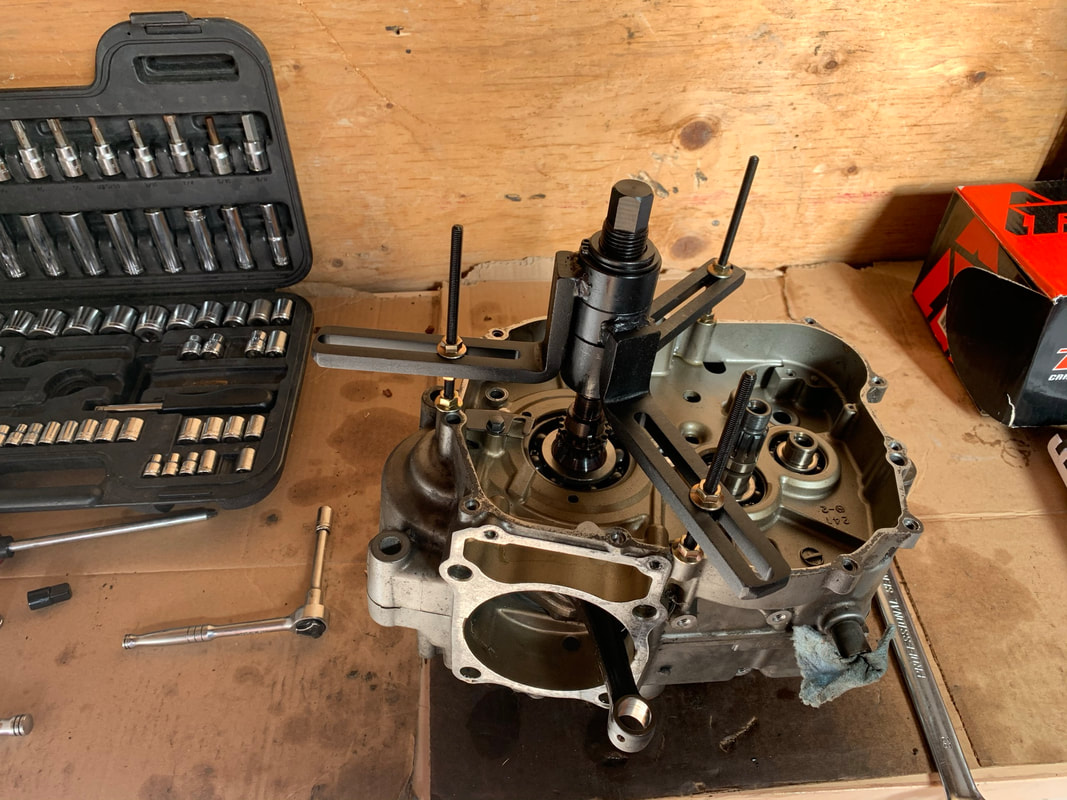
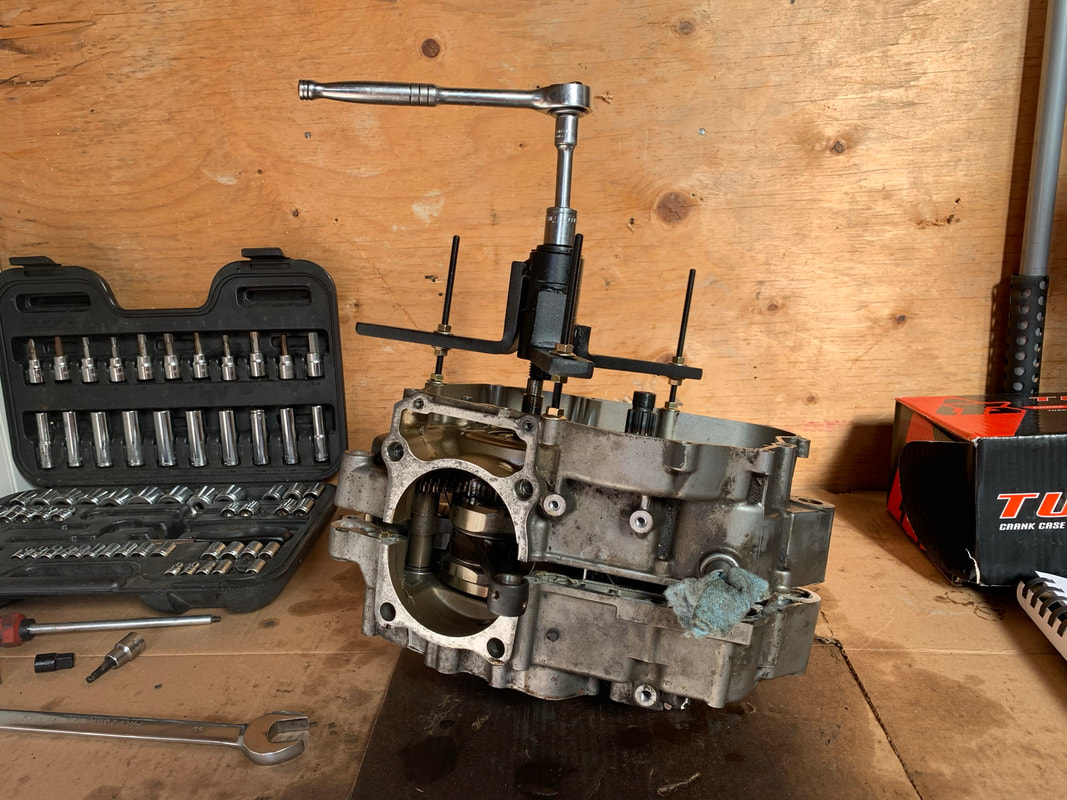
A Tusk Case Splitter tool finally arrives, time to crack this nut!
A Tusk Case Splitter tool finally arrives, time to crack this nut!
|
|
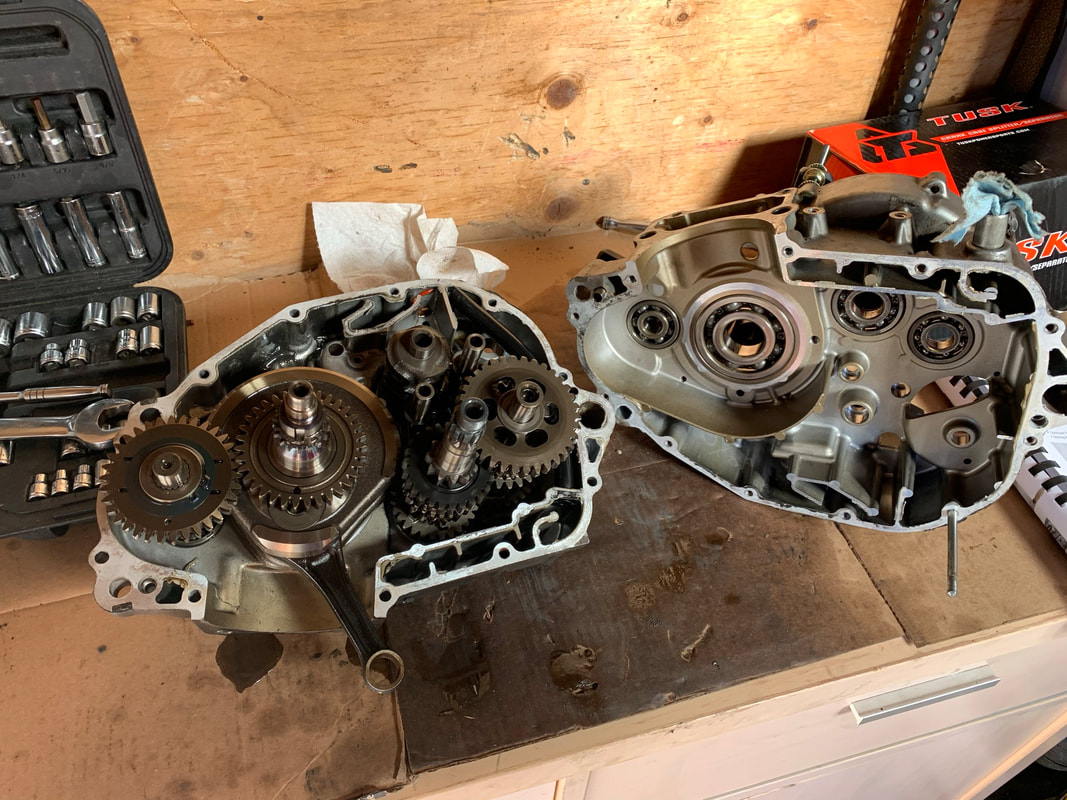
Transmission removed...the countershaft splines and collar are a mess from the welding blobs, damage from the sprocket and my grinding hatchet job!
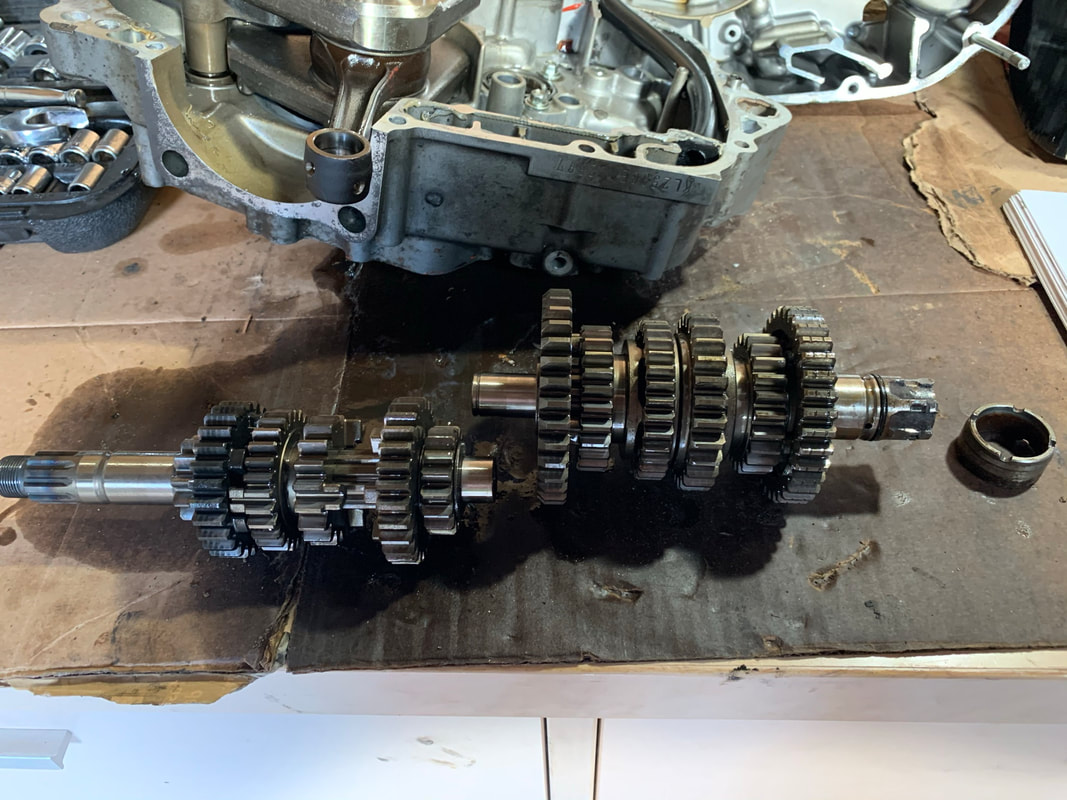
And finally, we come to the end, of the beginning! The countershaft disassembled and ready for inspection!

November 11, 2020
Transmissions parts have arrived! After many hours of cleaning off RVT, covers and gasket surfaces, it's time to put this puppy back together. Parts ordered/replaced were:
Transmissions parts have arrived! After many hours of cleaning off RVT, covers and gasket surfaces, it's time to put this puppy back together. Parts ordered/replaced were:
- 13128-1224 SHAFT-TRANSMISSION OUTPUT
- 13144-1237 SPROCKET-OUTPUT 14T
- 42041-1488 SPROCKET-HUB 43T
- 92027-1800 COLLAR 25X32X15.3
- 92033-026 RING-SNAP 24MM (x4)
- 92055-1293 RING-O 21.5X1.5
- 11061-1307 GASKET CYLINDER BASE
- 11009-1858 GASKET TENSIONER
- 11060-1324 GASKET CLUTCH COVER INNER
- 11060-1326 GASKET GENERATOR COVER
- 11060-1327 GASKET TRANSMISSION COVER
- 11060-1641 GASKET CAP
- 520 X-Ring 102 link chain
I did have to take the shift lever cover back off where oil was leaking and JB Weld a hairline crack caused by the stress of the jammed up chain.
|
|
|
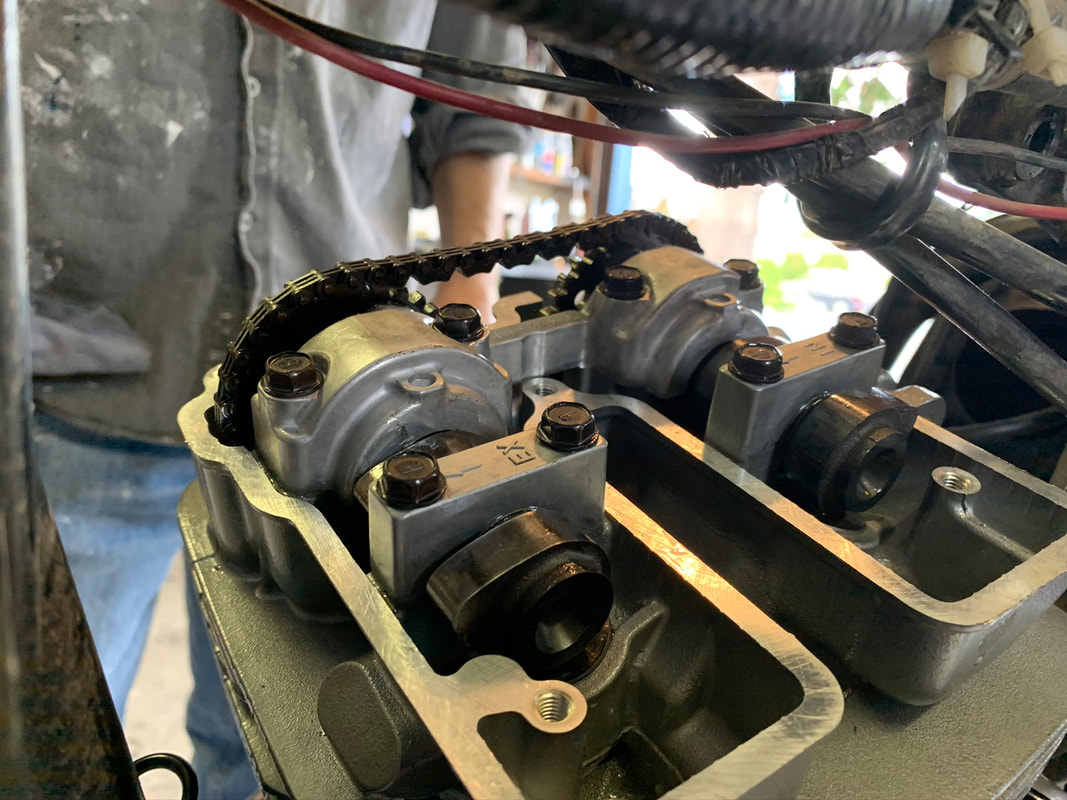
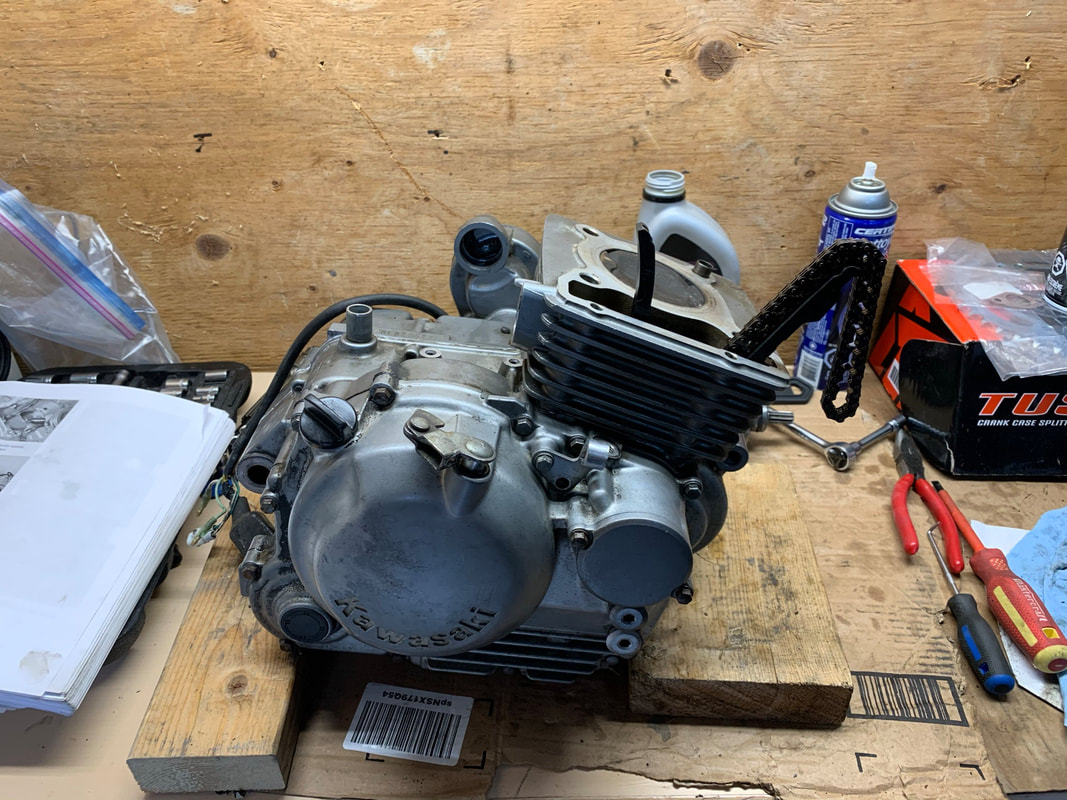
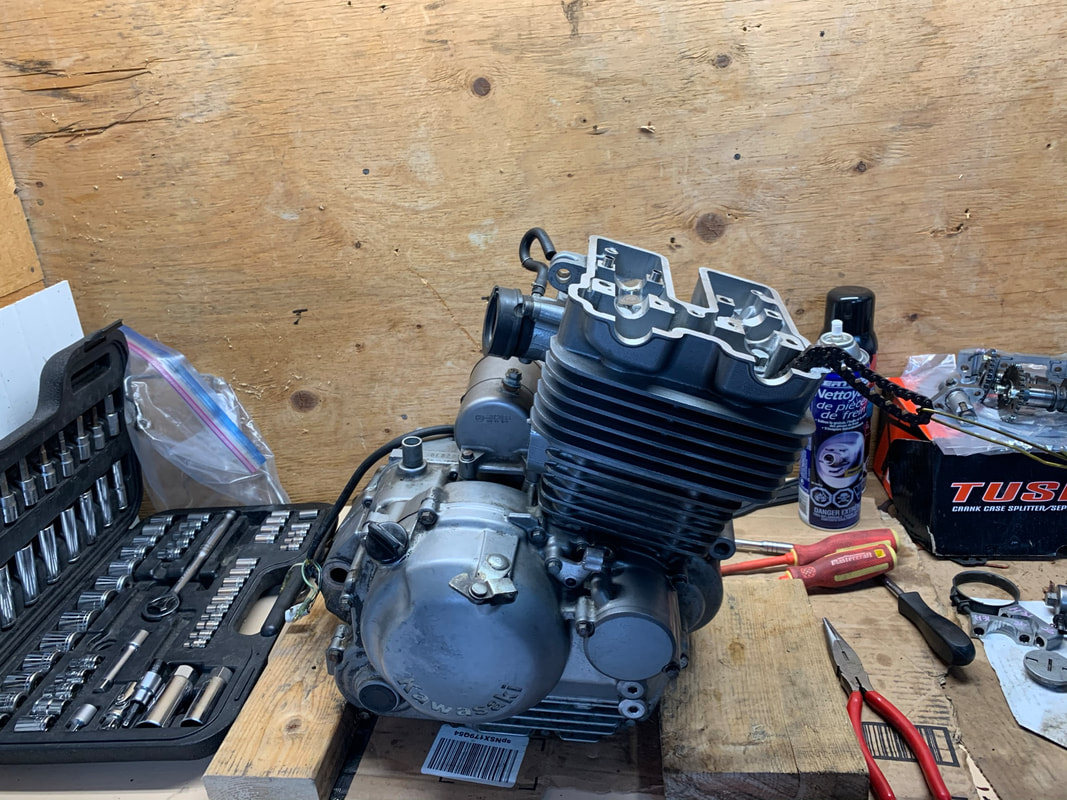
Getting the top end back on...
|
|
|
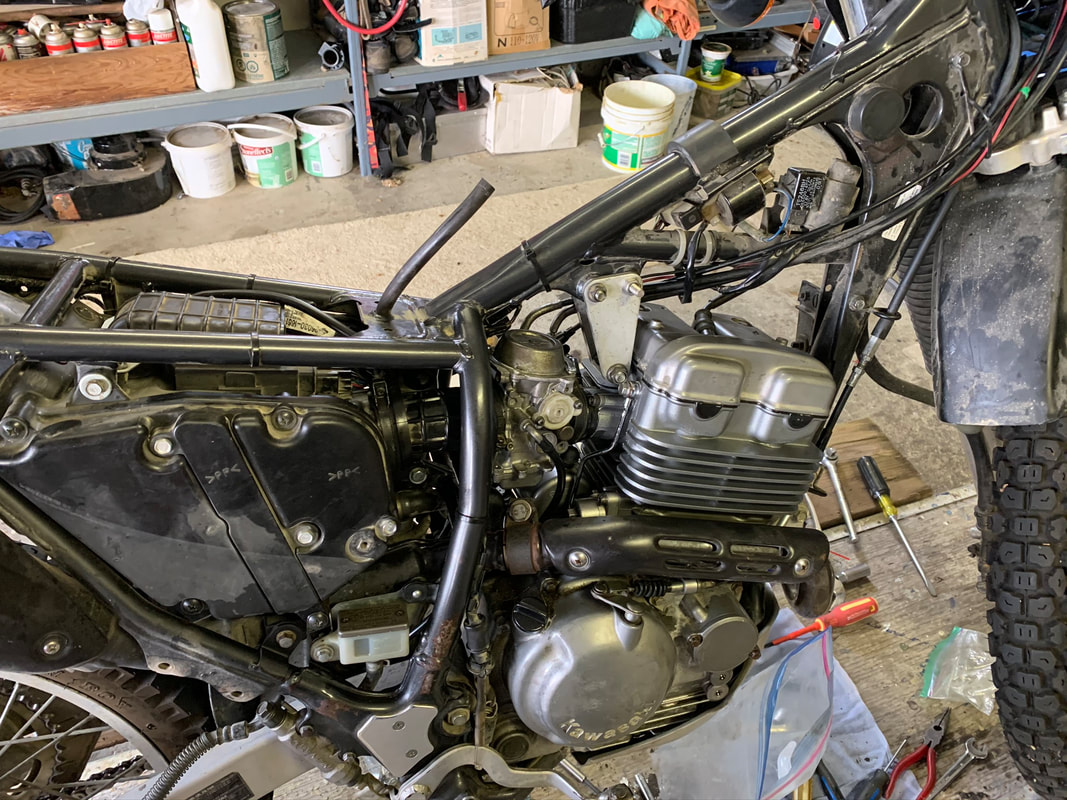
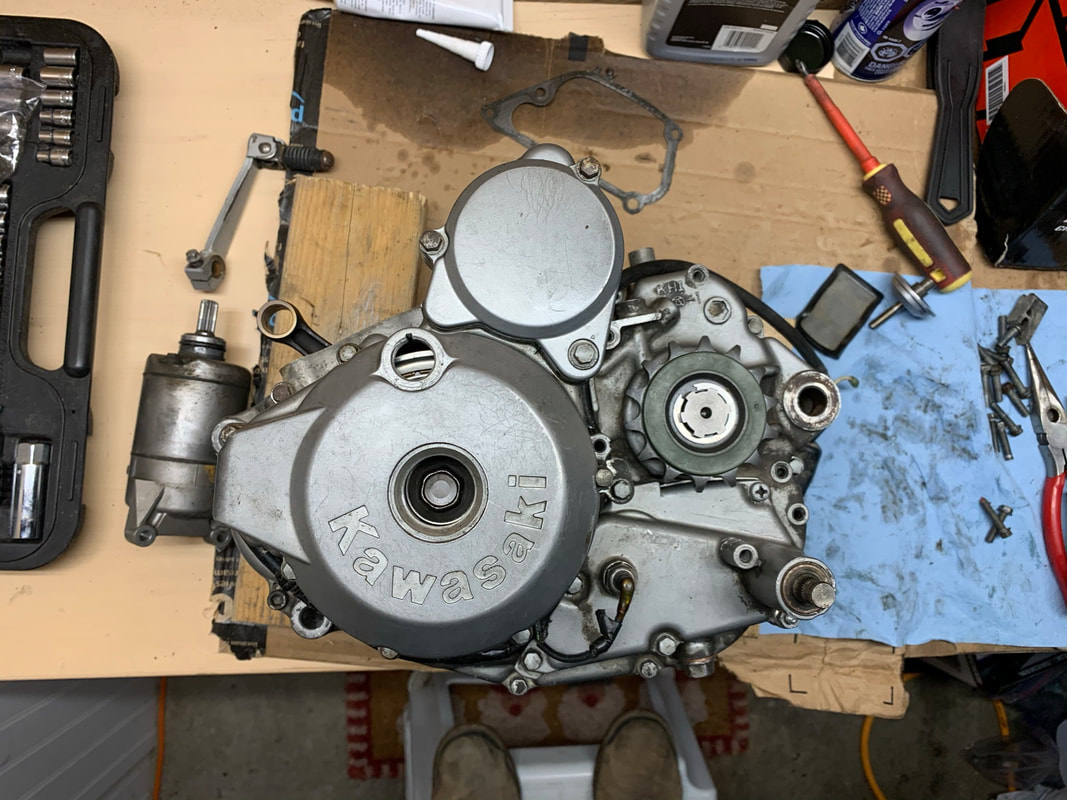
And finally, getting the engine back in the frame!
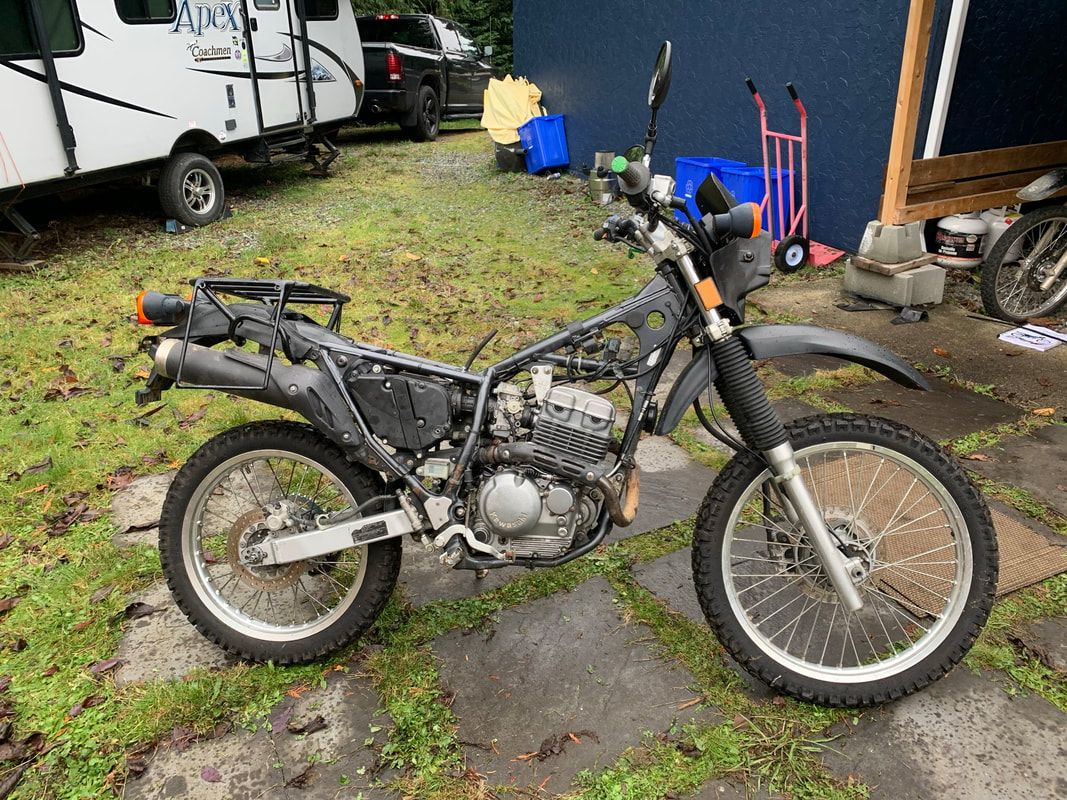
Lookin' good!
Will it run?
First time! The Sherpa fired right up, and is ready for action. After a few minutes all the oil had burned off and she was running smooth and clear. But is this the end of the Sherpa's troubles? There's certainly not really any place left for the previous owner to have sabotaged that I haven't already undone and fixed! I suppose only time will tell what mis-adventure the Sherpa brings me next.
PS - I also replaced the horn. Beep! Beep!
PS - I also replaced the horn. Beep! Beep!
June 19. 2021
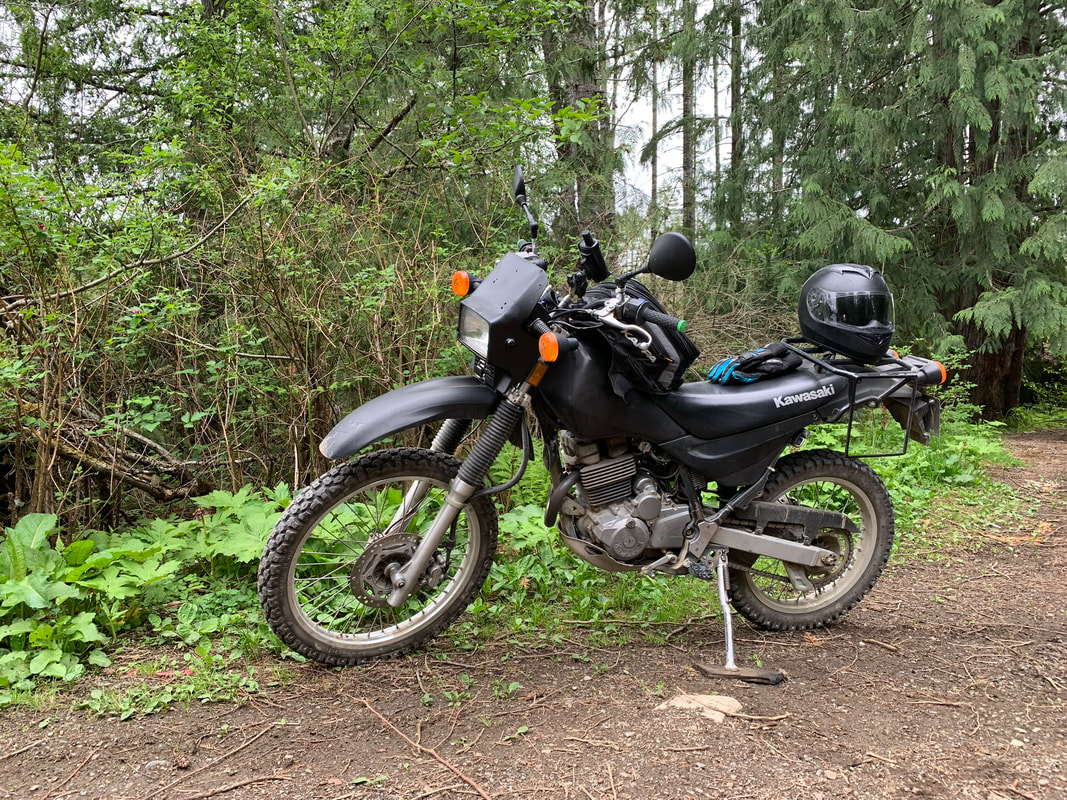
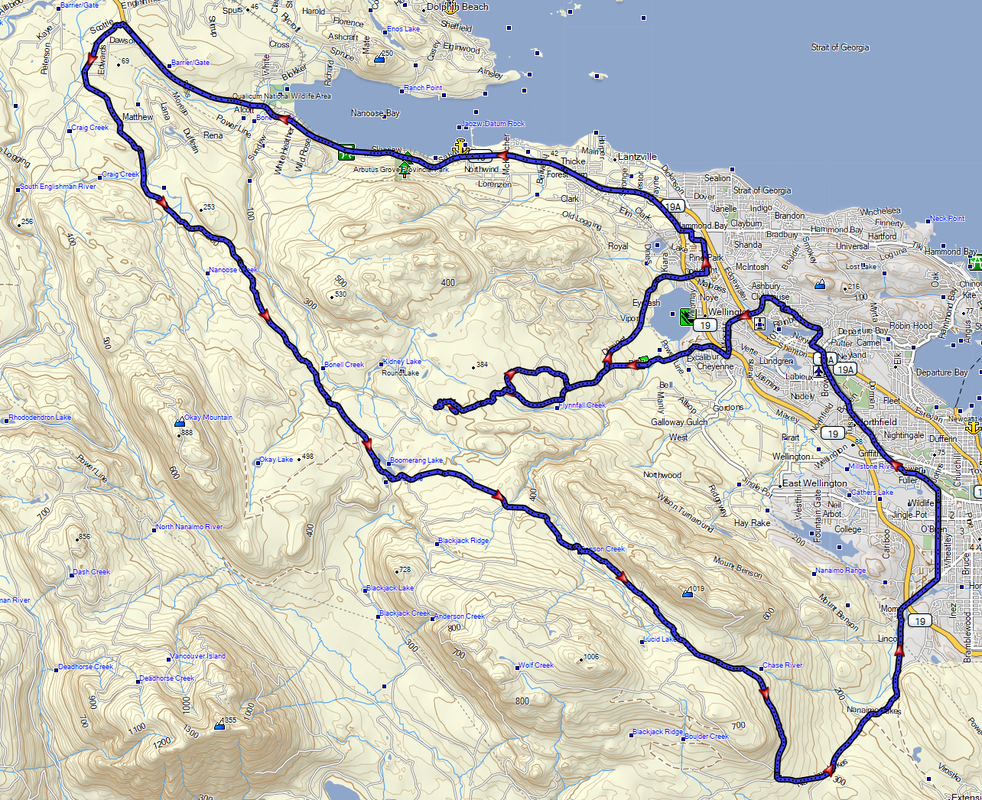
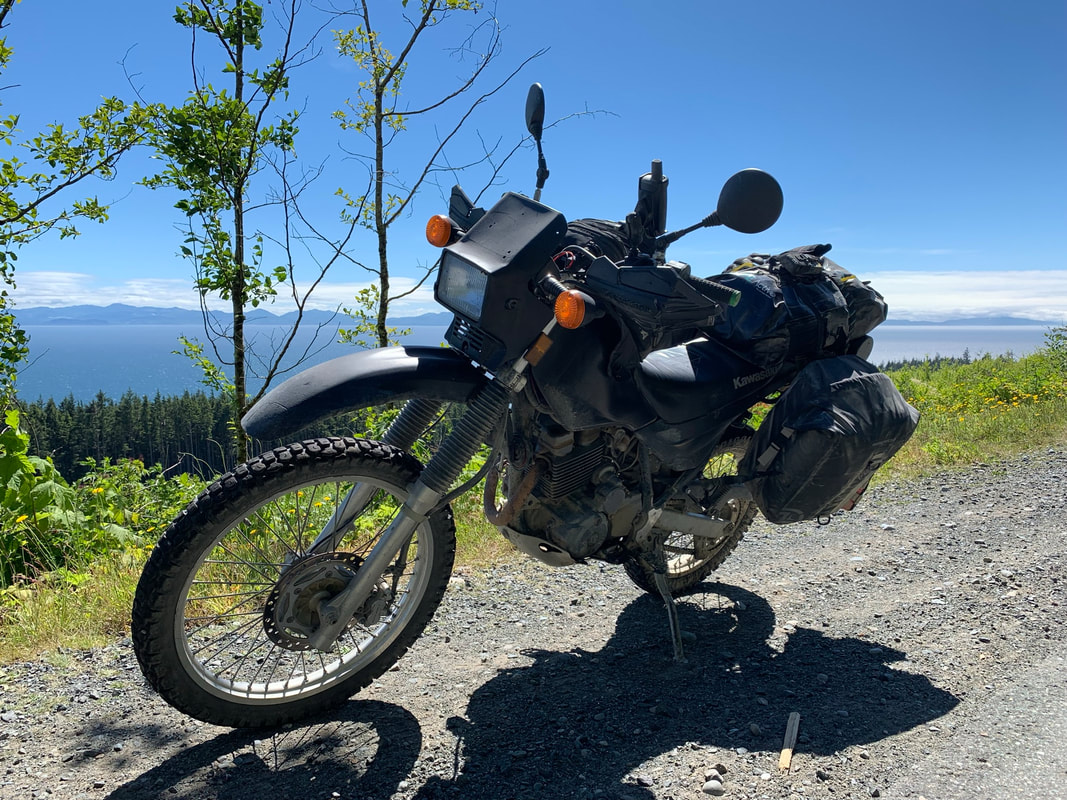
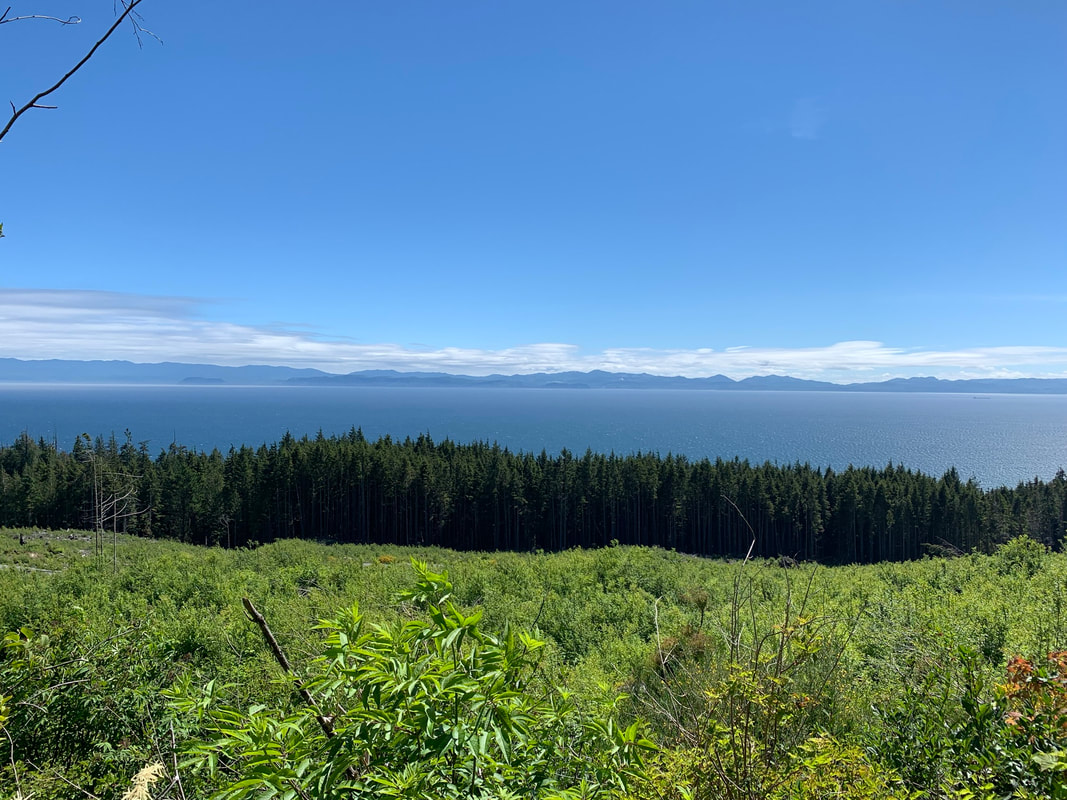
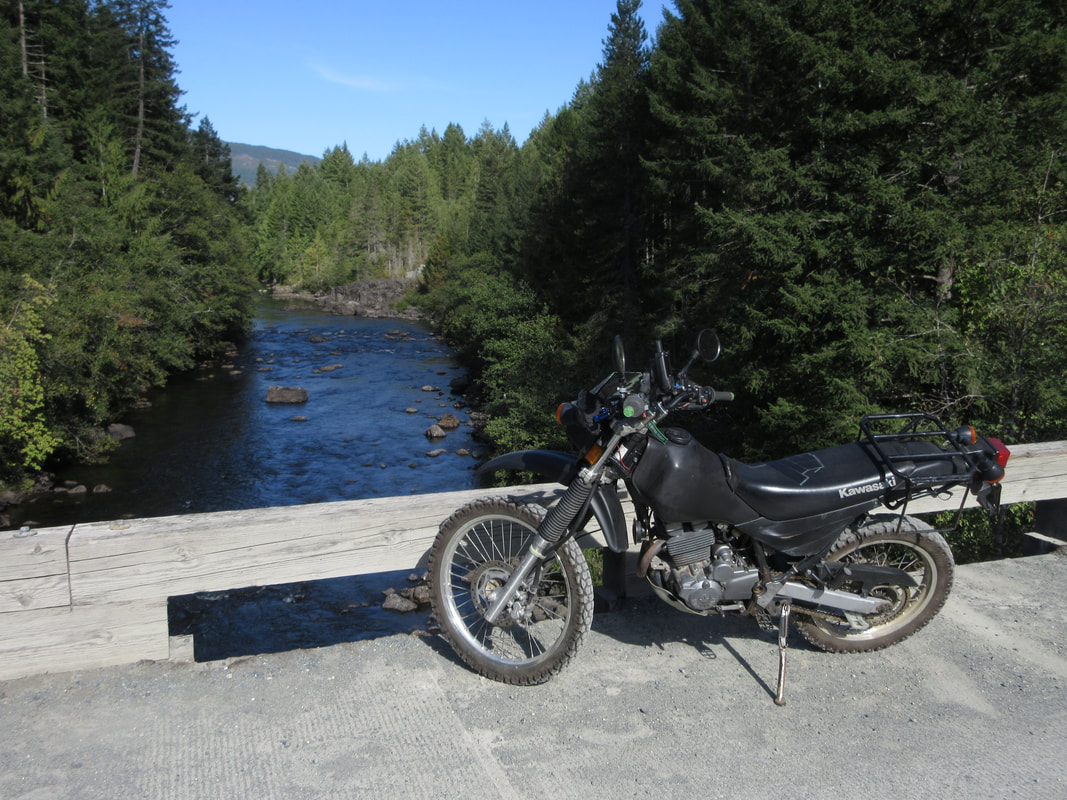
Finally with some free time, I went on a camping trip to Sooke on the Super Sherpa with a friend who was on his DRZ-400. This was my first camping trip with the Sherpa and it was loaded with camping gear. The Sherpa hauled the gear nicely!
Finally with some free time, I went on a camping trip to Sooke on the Super Sherpa with a friend who was on his DRZ-400. This was my first camping trip with the Sherpa and it was loaded with camping gear. The Sherpa hauled the gear nicely!

|
|
|
|
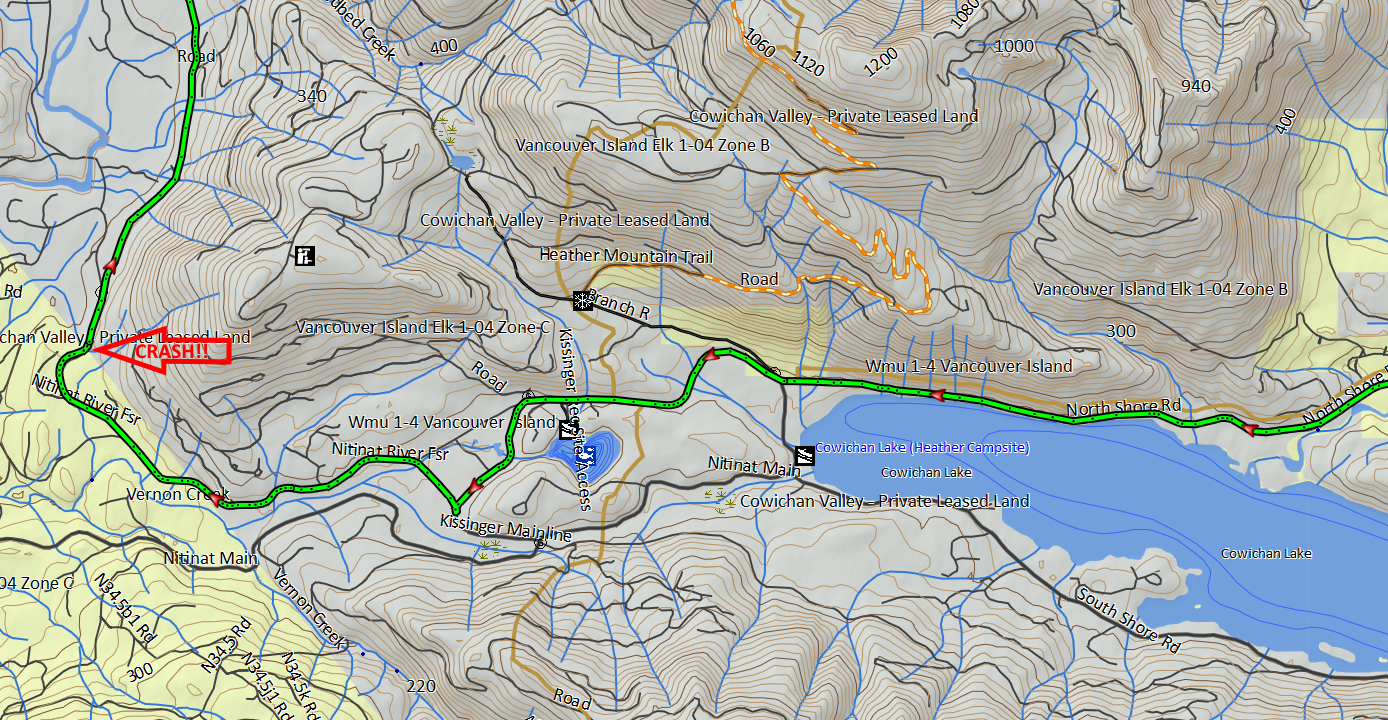
Unfortunately, on the way home, I had a pretty good crash! Shortly after turning up Nitinat Main, where the road randomly alternates between paved and gravel, a corner went from paved just before the turn, to gravel right into a left hand turn and I wasn't paying attention and slid out and rolled the bike! Luckily I wasn't hurt other than a few bruises, and the Sherpa only received relatively minor damage that I could see:
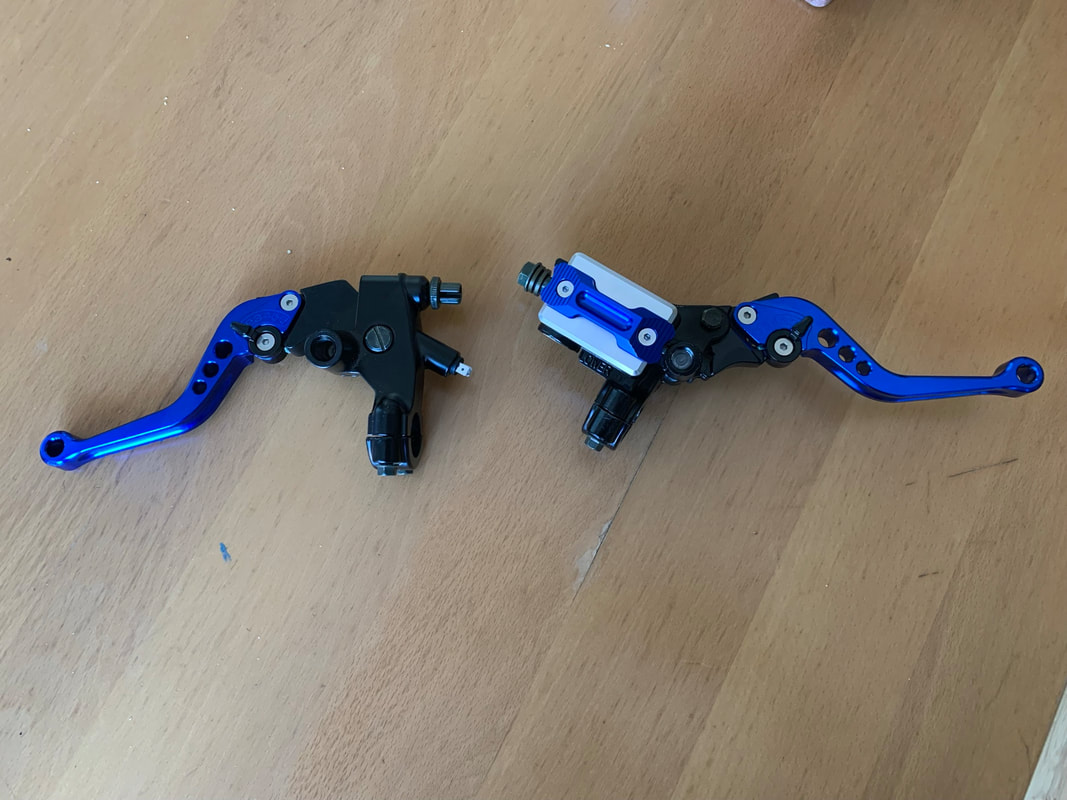
- Broken mirror perches on both the break and clutch
- Broken headlight
- Cracked headlight cover
- lost 1 fuel cannister, it was no where to be found! (We were thinking perhaps it was lost further back at another point in the return trip)
July 1, 2021
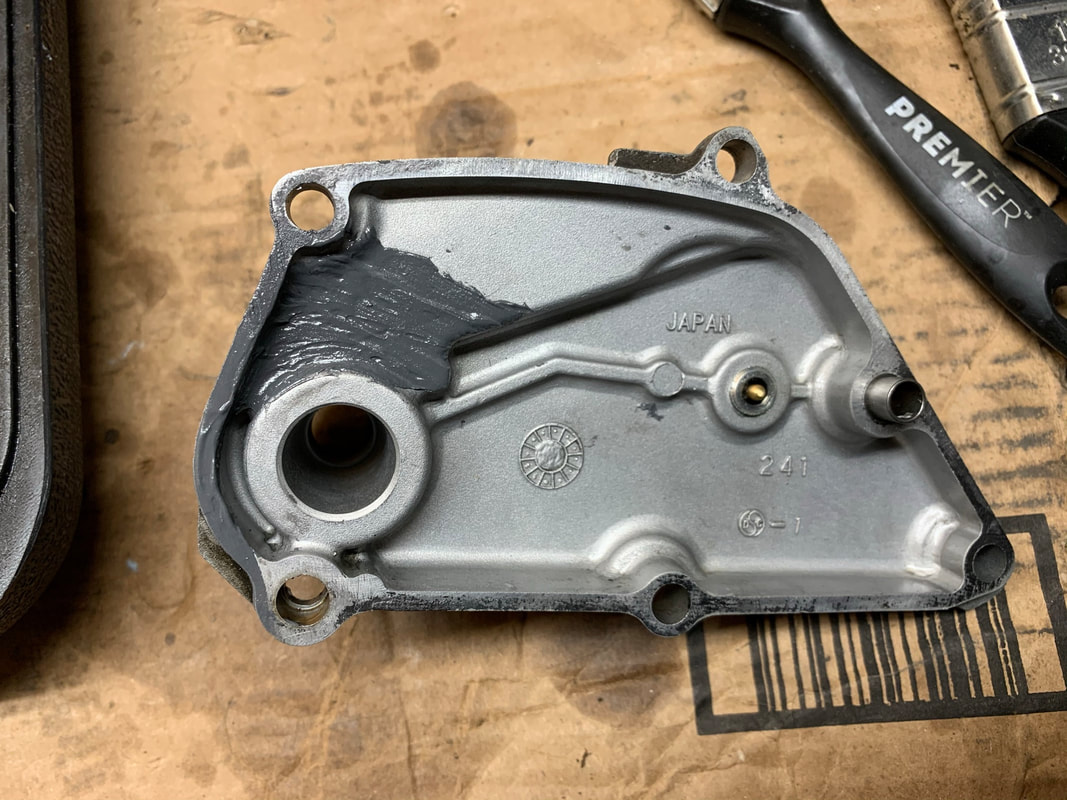
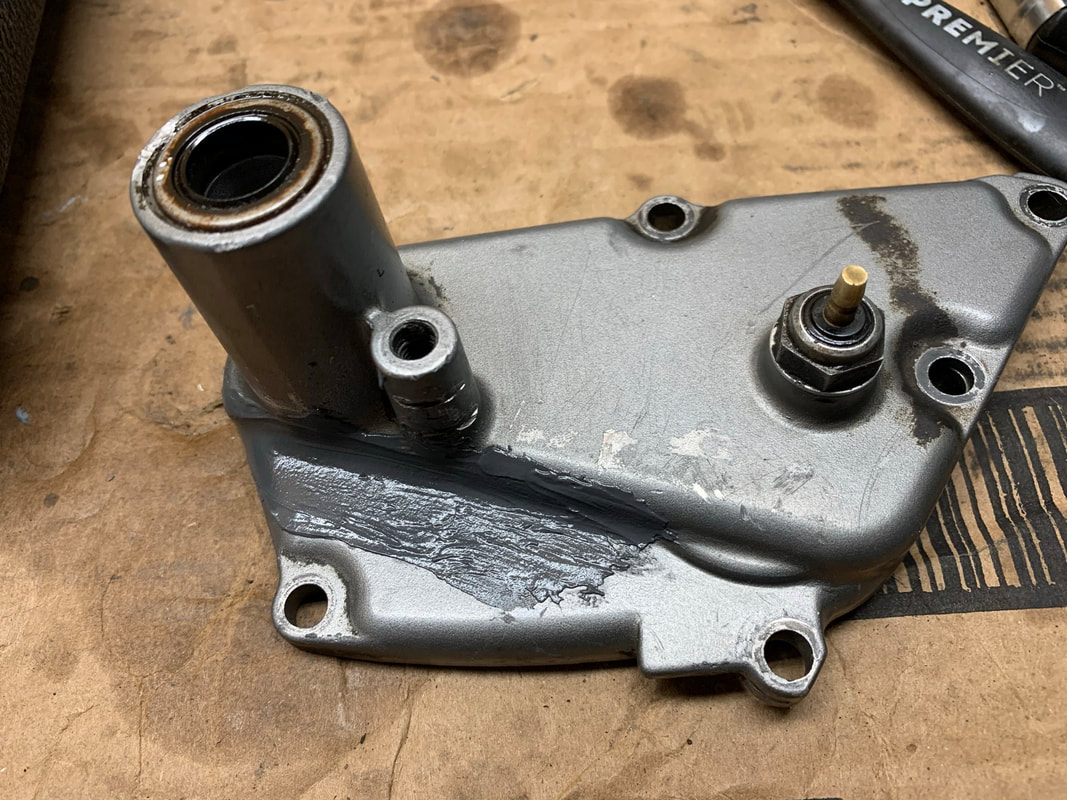
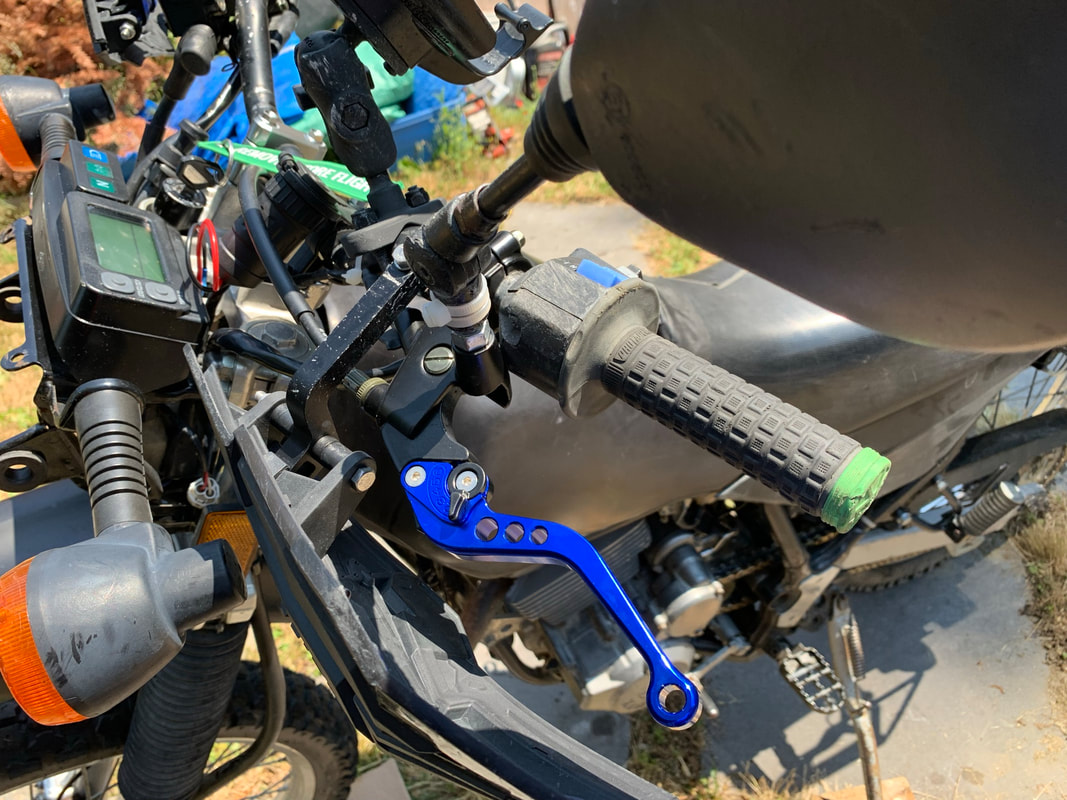
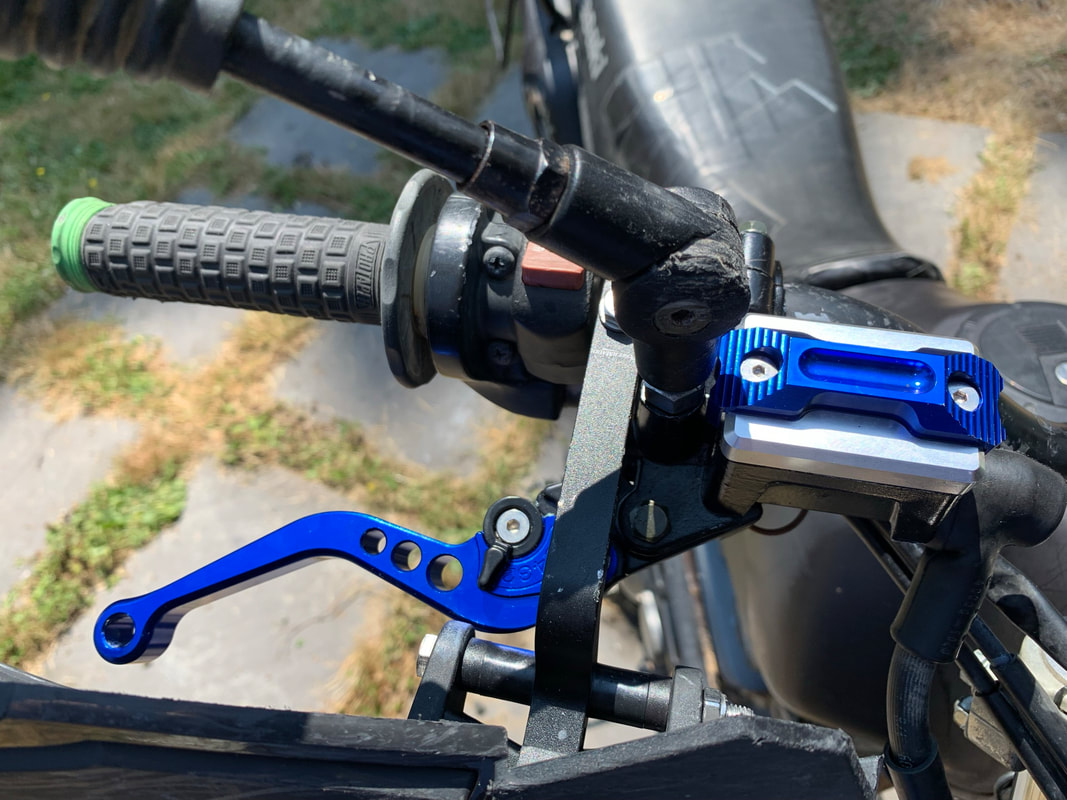
Time for some new clutch and break levers, and I found that a previous patch on the flywheel cover by the previous owner had re-cracked (most likely during the crash coming home from Sooke!) and was leaking oil. The new levers installed quickly, I cleaned off the cover and used some JB Weld to fix the cracked patch, but the headlight was back ordered to Japan so it'll be a few more weeks before the Sherpa is back in action.
Time for some new clutch and break levers, and I found that a previous patch on the flywheel cover by the previous owner had re-cracked (most likely during the crash coming home from Sooke!) and was leaking oil. The new levers installed quickly, I cleaned off the cover and used some JB Weld to fix the cracked patch, but the headlight was back ordered to Japan so it'll be a few more weeks before the Sherpa is back in action.
|
|
|

|
July 3, 2021
I found the gas cannister that was lost on the return from Sooke! I had a hunch it had fallen off at an intersection where I rode through some rough stuff about 10 minutes before I crashed, so I took the TU250X for a morning ride to check it out. And there it was! It took me 2 walking passes to notice it. It was all dusty from the traffic on the gravel road and basically invisible if you weren't looking for it. It was sitting pretty in the tall grass on the side of the rode about a foot in on the bank of the shoulder!
I found the gas cannister that was lost on the return from Sooke! I had a hunch it had fallen off at an intersection where I rode through some rough stuff about 10 minutes before I crashed, so I took the TU250X for a morning ride to check it out. And there it was! It took me 2 walking passes to notice it. It was all dusty from the traffic on the gravel road and basically invisible if you weren't looking for it. It was sitting pretty in the tall grass on the side of the rode about a foot in on the bank of the shoulder!
August 14, 2021
I had noticed on my last trip to Sooke on the Super Sherpa in June that the clutch was starting to slip, so I ordered some new friction plates and springs as I had no idea the last time they had been replaced. The parts finally arrived after a back order from Japan (for clutch plates!), and I finally took things apart and found this!
I had noticed on my last trip to Sooke on the Super Sherpa in June that the clutch was starting to slip, so I ordered some new friction plates and springs as I had no idea the last time they had been replaced. The parts finally arrived after a back order from Japan (for clutch plates!), and I finally took things apart and found this!

Argh! The previous owner has screwed me again! Instead of replacing the $40 clutch wheel for the 2 broken spring posts, he used JB Weld or epoxy or something and fastened 2 short bolts from the back, and then used 2 more short bolts from the top to compress the spring plate. Not cool!
So now I've got the clutch wheel on order. Grrr...
So now I've got the clutch wheel on order. Grrr...
August 29, 2021
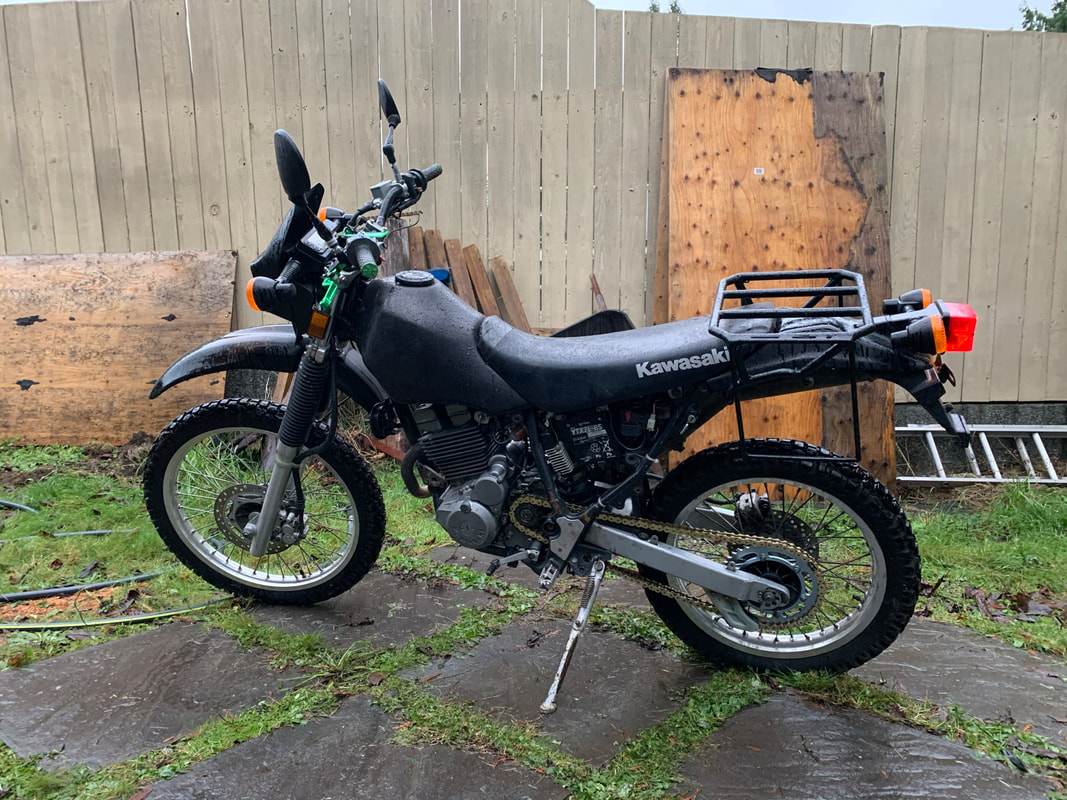
The Sherpa clutch is all back together again! Took a lovely easy ride out Nanaimo Lakes today putting the clutch through it's paces. The Sherpa is running great! Frankenstein's Monster definitely is looking sweet! :-D
The Sherpa clutch is all back together again! Took a lovely easy ride out Nanaimo Lakes today putting the clutch through it's paces. The Sherpa is running great! Frankenstein's Monster definitely is looking sweet! :-D
|
|
September 6-9, 2021
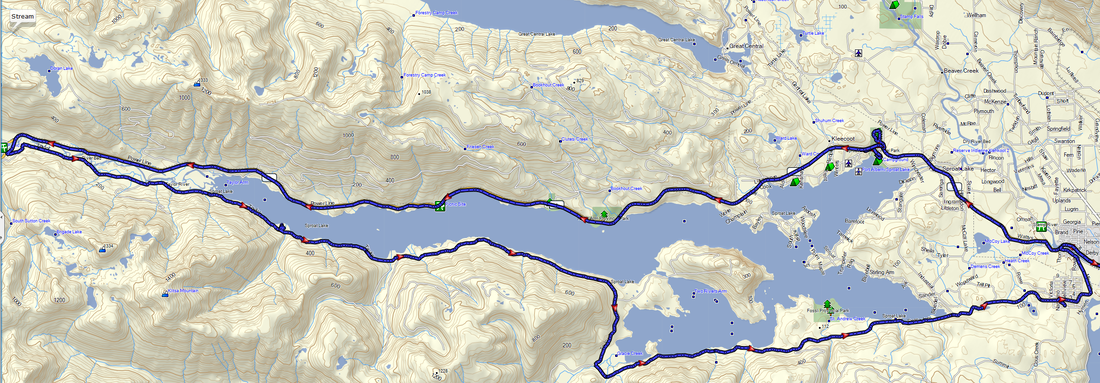
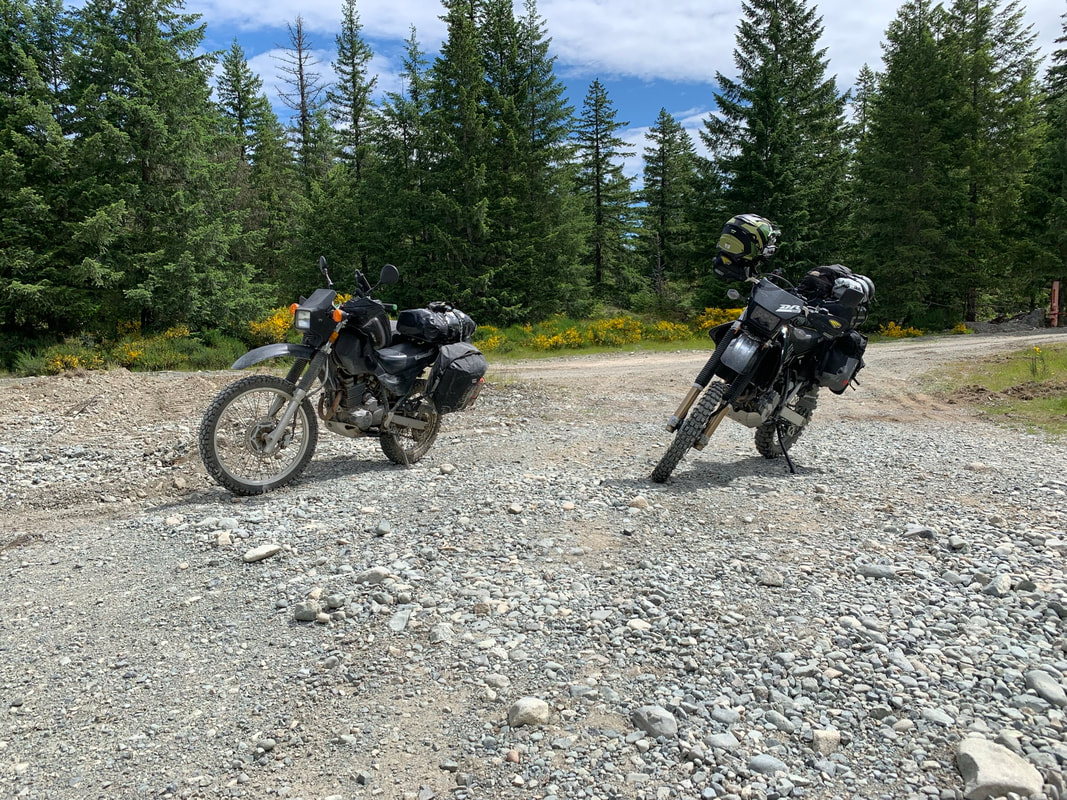
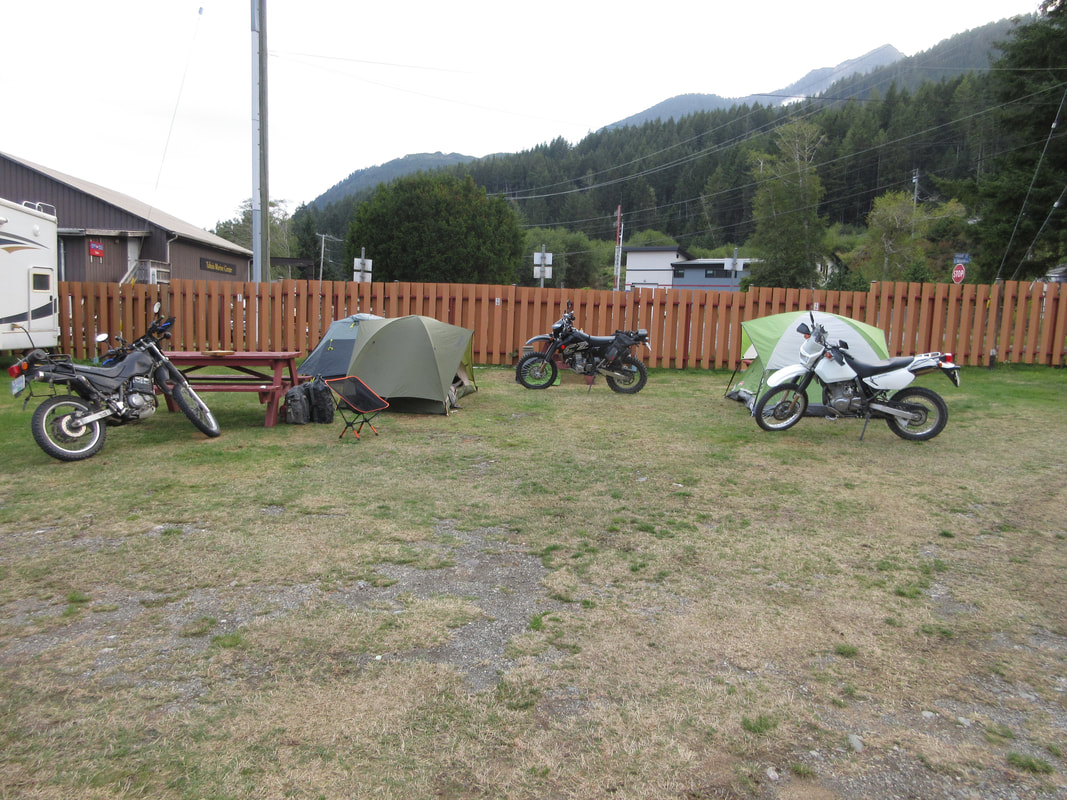
What was intended to be a 5 day camping trip with the Super Sherpa and 2 other friends, ended up being cut short by torrential rain that started in the late afternoon on day 3. The Sherpa held up admirably and packed me and my gear across hundreds of Kms of logging roads, forestry roads and 100 Km/h highways with the entire trip totalling 1084 Km travelled.
What was intended to be a 5 day camping trip with the Super Sherpa and 2 other friends, ended up being cut short by torrential rain that started in the late afternoon on day 3. The Sherpa held up admirably and packed me and my gear across hundreds of Kms of logging roads, forestry roads and 100 Km/h highways with the entire trip totalling 1084 Km travelled.
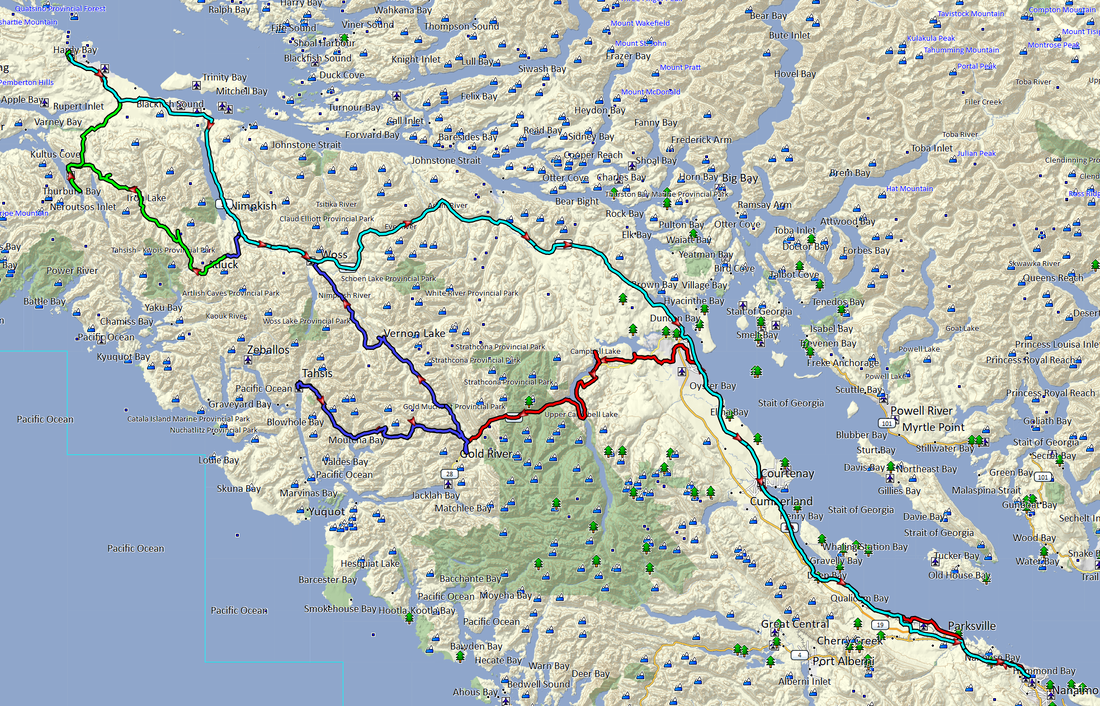
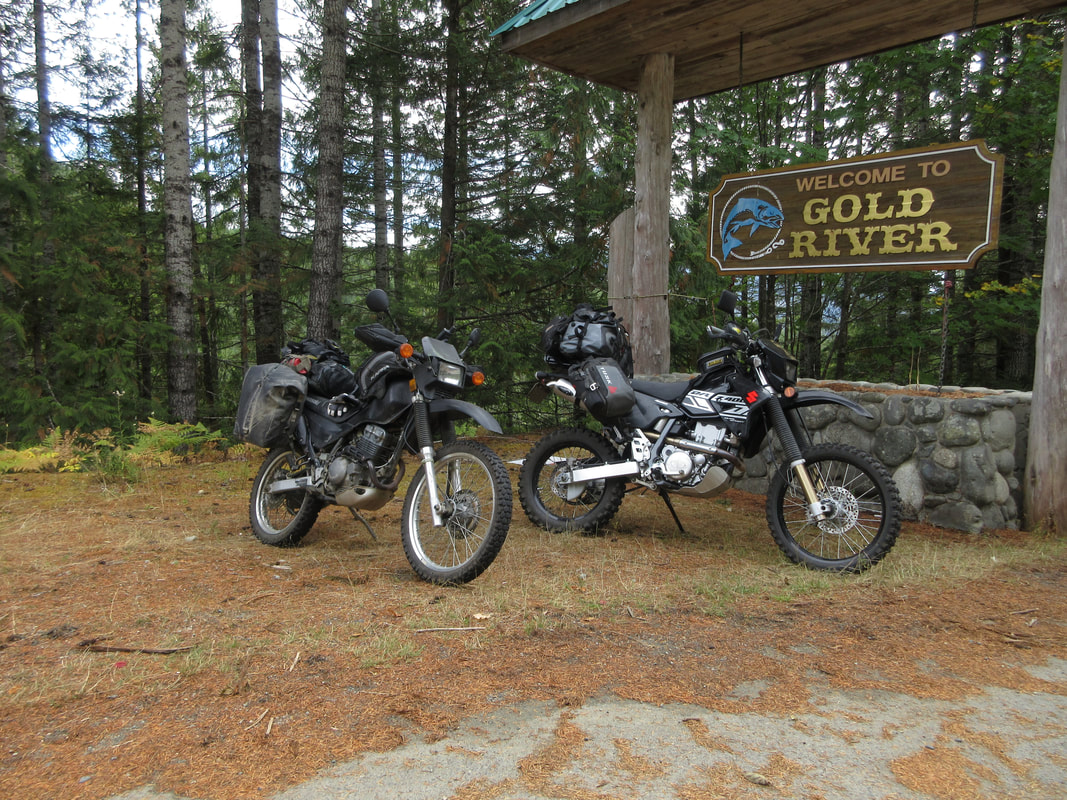
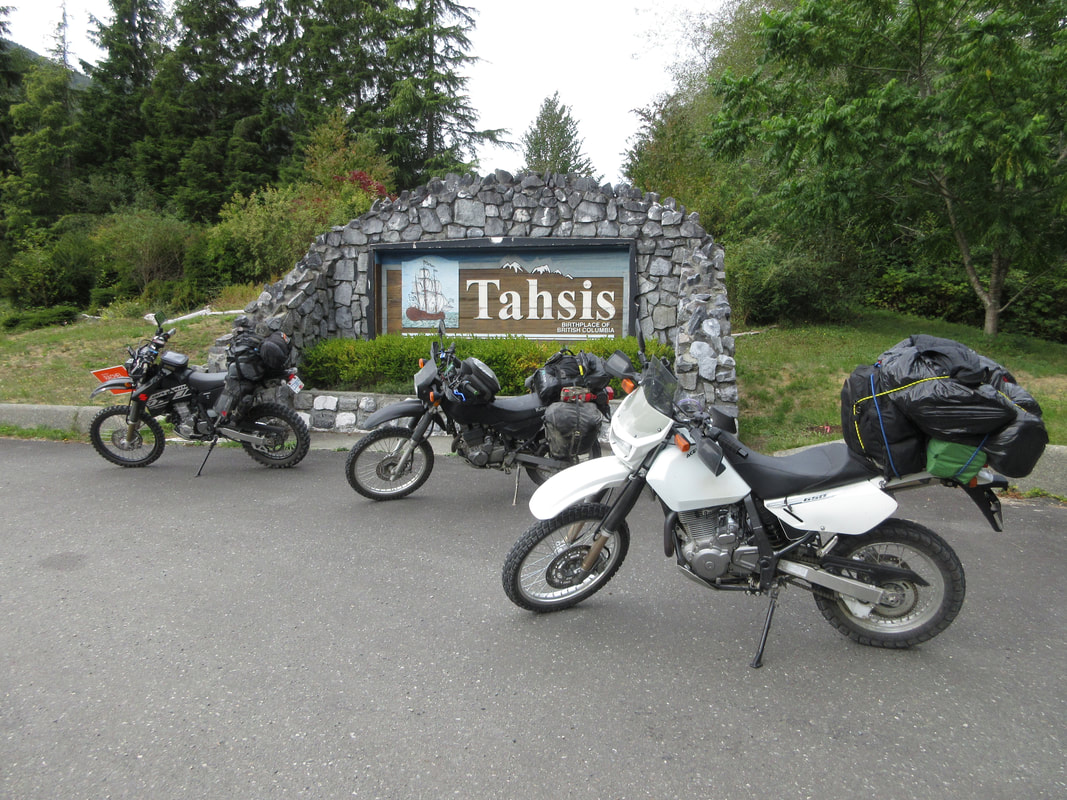
Day 1 was a lot of highway Kms, to get to Campbell River. We then enjoyed some forestry roads and logging roads to Gold River, then went on to Tahsis where we were unfortunately unable to get a camp site at the first come first serve BC Recreation Camping site just outside the village. In Tahsis we were glad to get set up at a RV site for our first night. It was nothing rustic but was clean, dry and had a great view.
|
|
|

|
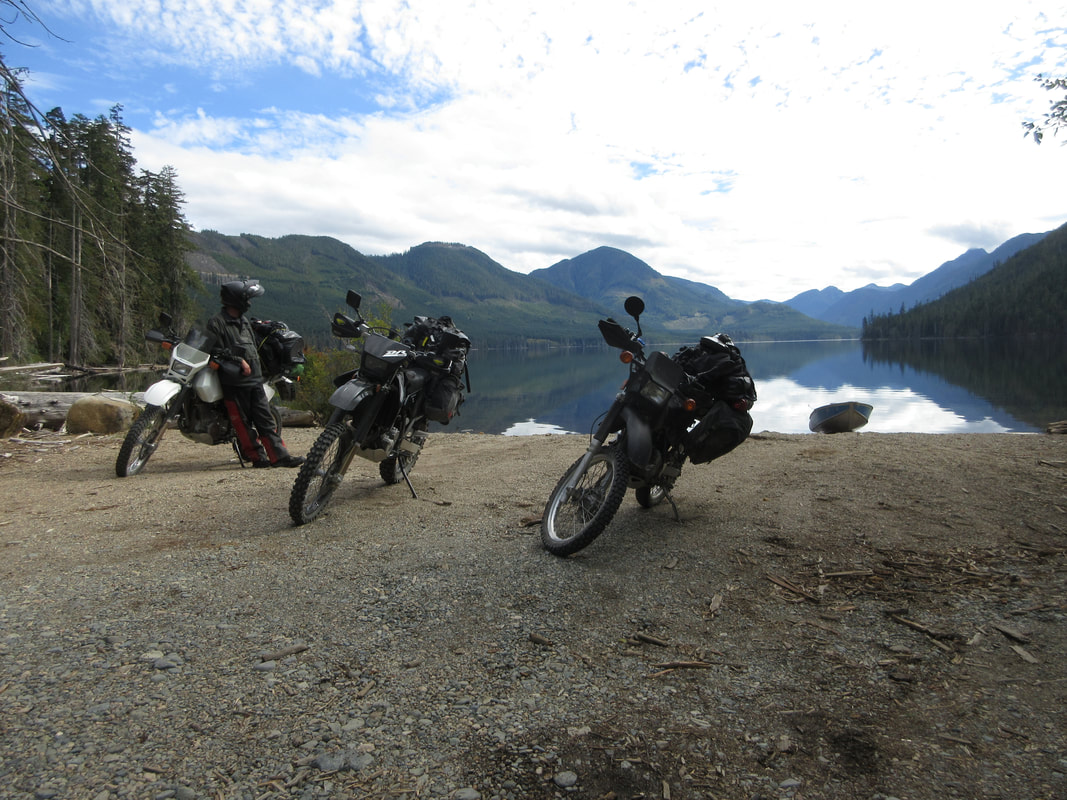
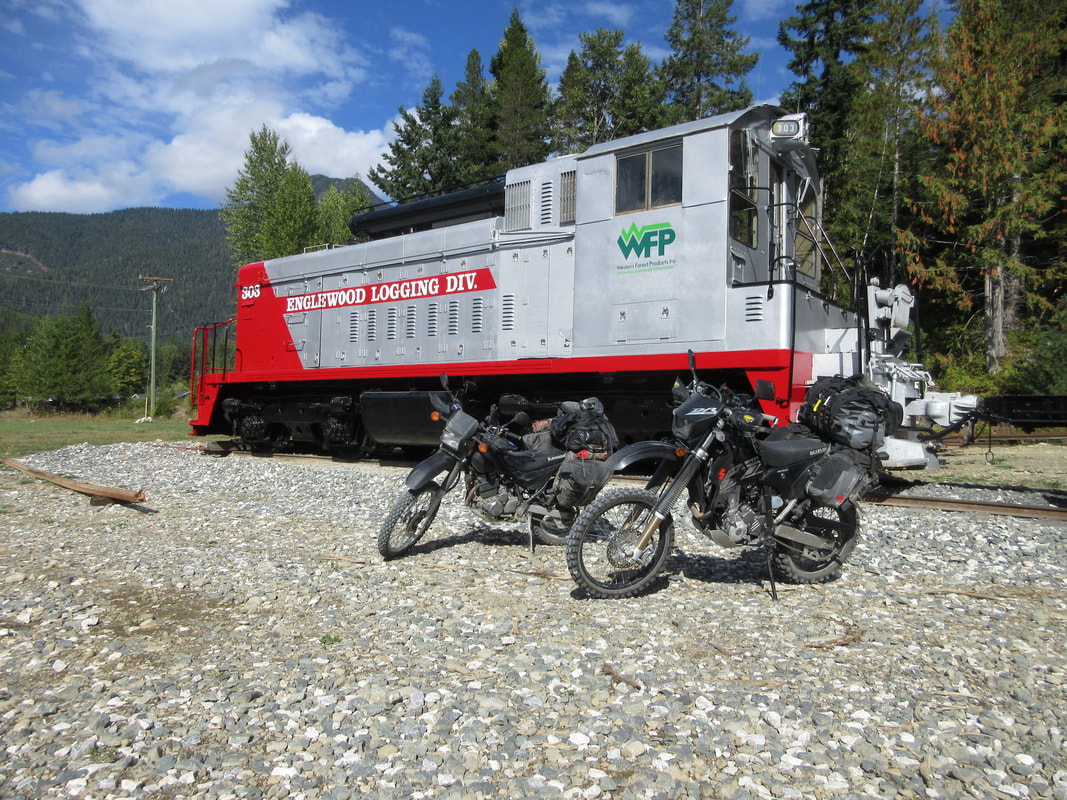
Day 2 was a lovely warm day, traveling almost entirely on logging and forestry roads. After back tracking into Gold River for gas and lunch we began the trek out to Woss, making quick pit stops at the Vernon Lake rec site which was, to our surprise, fully occupied after the Labour Day long weekend, as well as checking out what remains of a rail road logging operation just outside of Woss. After a tip from a fellow rider at the Woss gas station, we spent the night at the Atluck Lake Rec site which we had essentially to ourselves.
|

|
|
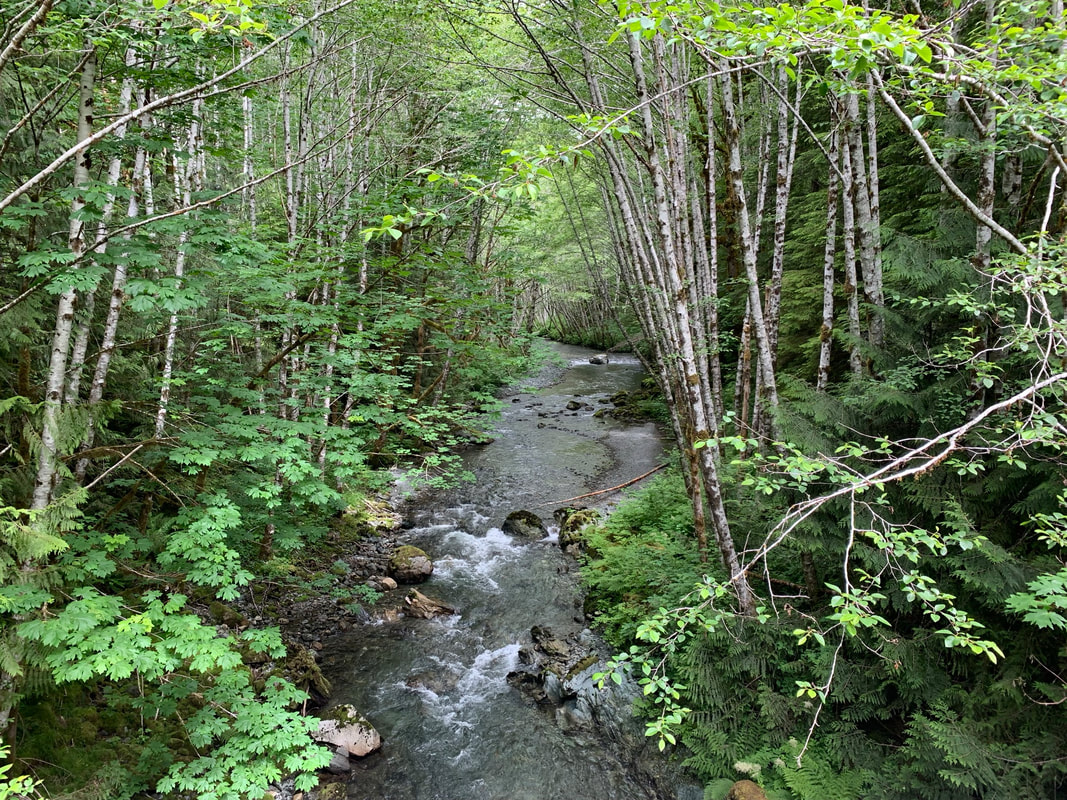
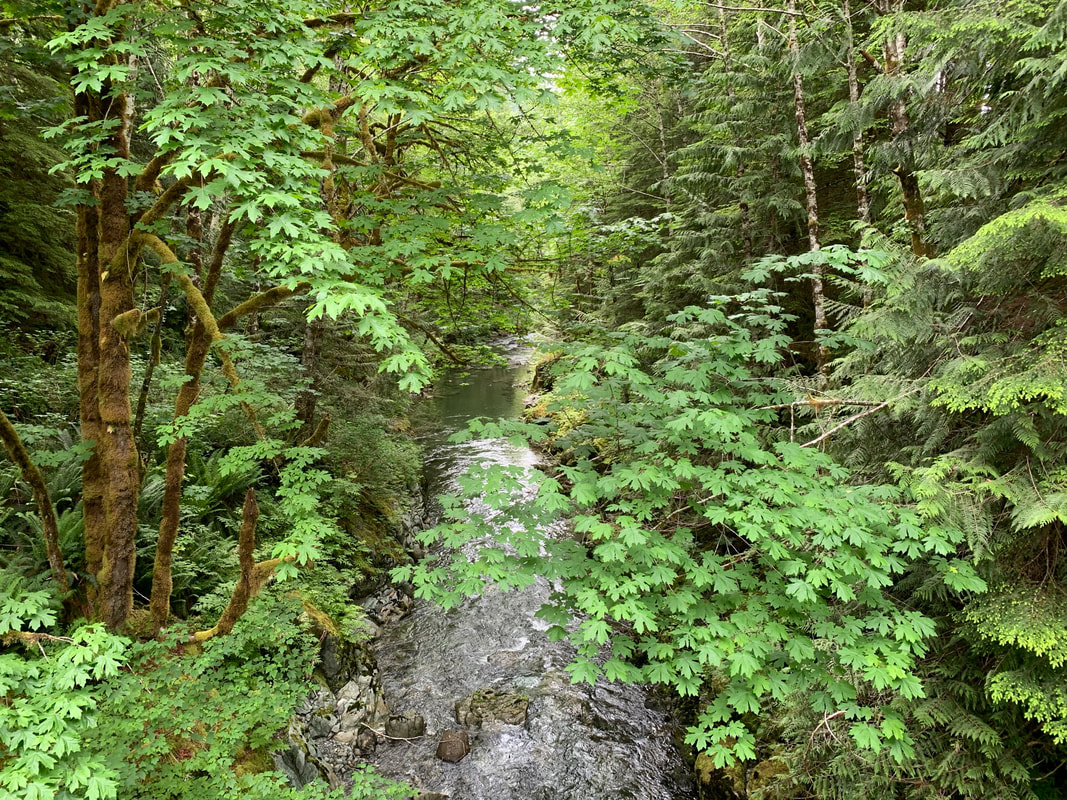
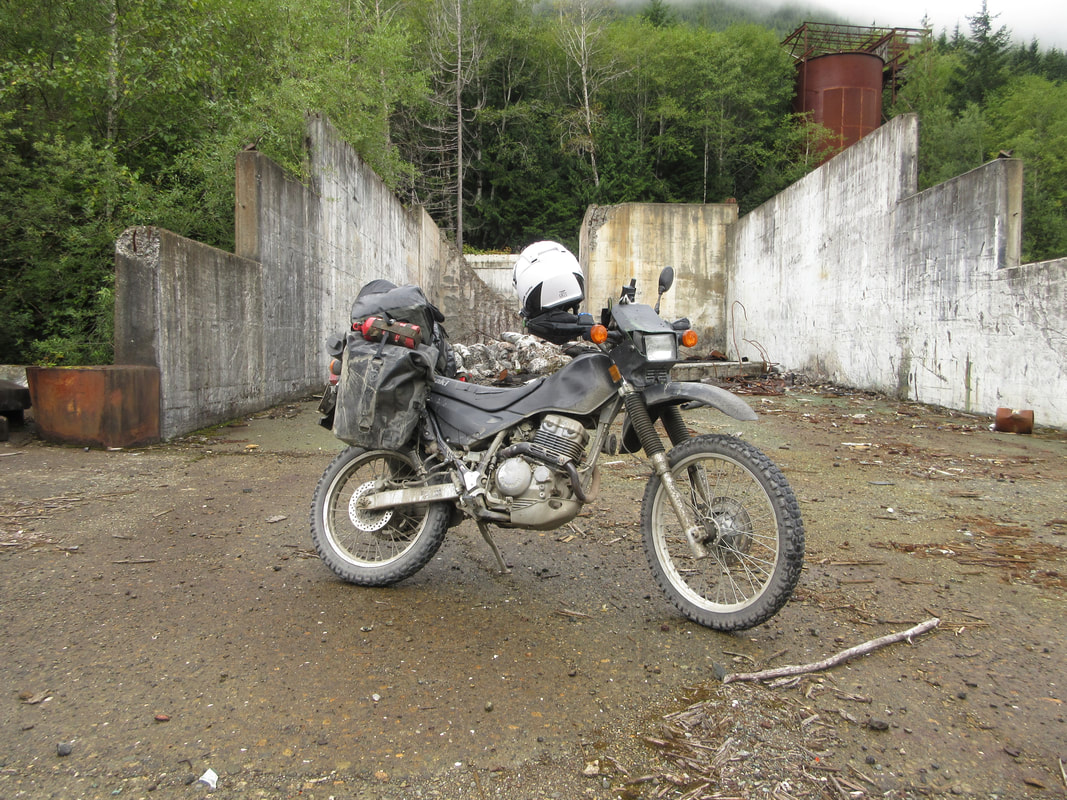
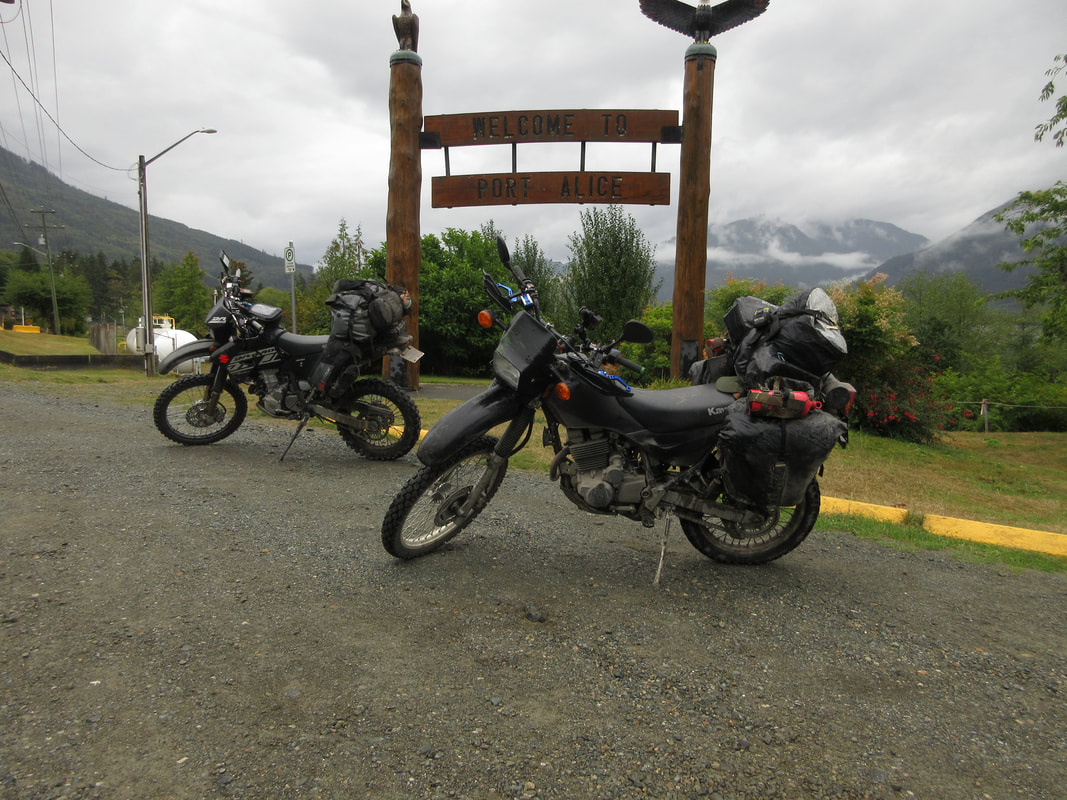
Day 3 It had rained overnight and continued to fall while we packed up in the morning. The morning rain didn't last too long and we headed out on some terrific forestry roads, riding from AtLuck Lake on our way to Port Alice.
Two interesting stops along the way was Devil's Bath and Eternal Fountain. Devil's Bath is the largest cenoté north of Mexico. What is a cenoté? Basically it is a big hole in the ground filled with water. This unique geological feature measures 360 metres (1,180 ft) around and 44 metres (145 ft) deep. The entire area around the Benson River displays karst features (sinkholes, springs that flow out of the ground then go underground again), of which Devil’s Bath is the most prominent. At Eternal Fountain, the creek falls over a limestone ledge before reversing direction and disappearing into the ground. It does looks like a water fountain. The waterfall tunnels twist and turn as an underground stream continues downward into a cave.
Just as we were getting closer to Port Alice in the late afternoon, the rain retuned coming down pretty hard. We got into Port Alice hoping for a motel so we could dry out, but all the accommodations in town had closed in recent years after the pulp mill had closed. The the rain was coming fast and furious, we gassed up and booked it to Port Hardy where we managed to get the last room out of the 3 motels in town. We were very tired, cold and hungry!
|
|
Day 4 was still raining. We had decided to cut the trip short the night before, as the weather forecast was showing 100% rain over the next several days which was disappointing as there were still several destinations we wanted to get to. We had a brief break in the rain as we headed out, but that didn't last long. South of Port McNeill was the fiercest wave of rain yet! About half way along the highway skirting Nimpkish lake the Sherpa engine started cutting out and quickly died. I was pretty sure I had a wet spark plug as I have experienced this before, usually after washing the bike. Water tends to pool in and around the spark plug boot. In the down pour, I managed to dry out the plug and boot with a couple napkins, and after a shot of WD40 into the plug boot I was off and running again.
The rain continued for about 2 hours until just outside Campbell River. At this point we noticed the temperature had also started to rise and we were no longer freezing cold, just "regular" cold, not to mention, completely soaked. At the final stop in Courtenay for gas, I noticed my rear brakes were not responding, and a quick inspection at the gas station showed that at some point, somehow, I had lost a rear brake pad! Well, I still had front brakes and was off again, determined to get home! I arrived home mid afternoon, wet and very tired. What a trip! It was a lot of fun and was just a taste of the vast areas to explore on northern Vancouver Island.
I left all my gear on the bike, went inside and immediately had a long a lovely shower, followed by some food and a glorious nap! I didn't unpack anything until the next day which was warm and sunny. I dried out the tent and all my gear and took apart the rear brake to see what happened and needed to be repaired.
September 10, 2021
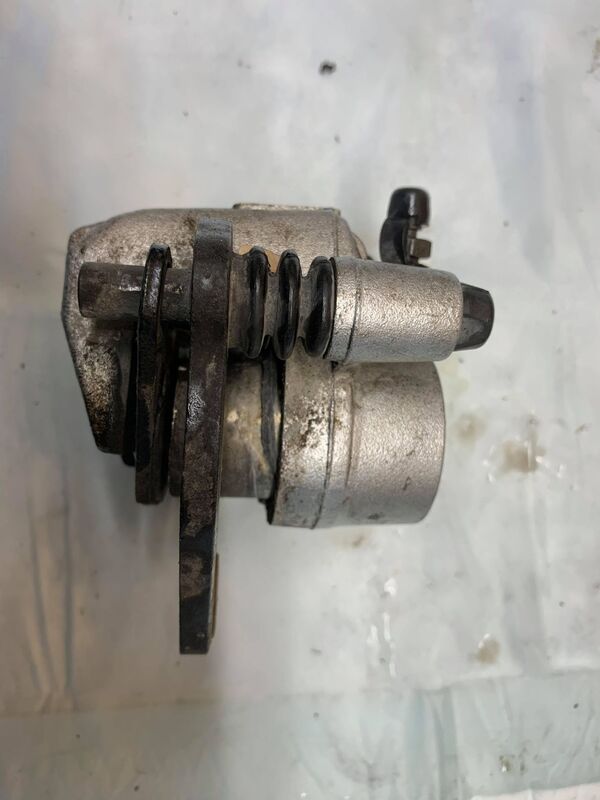
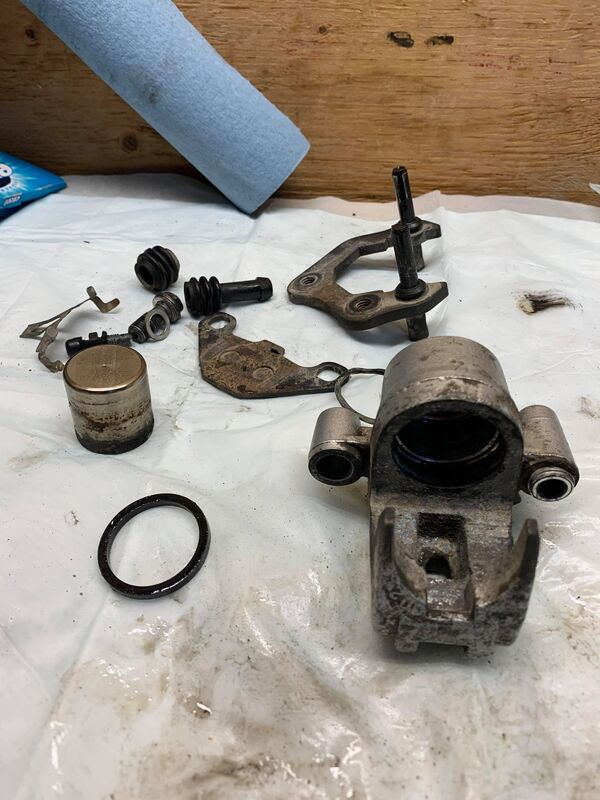
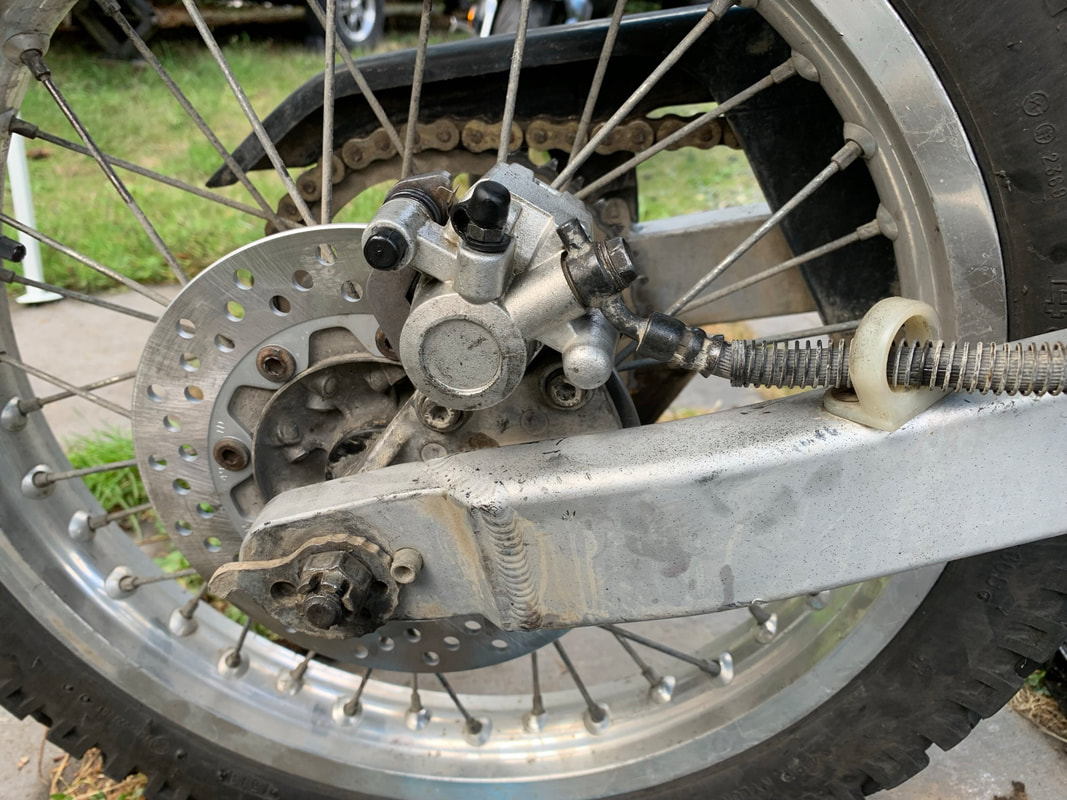
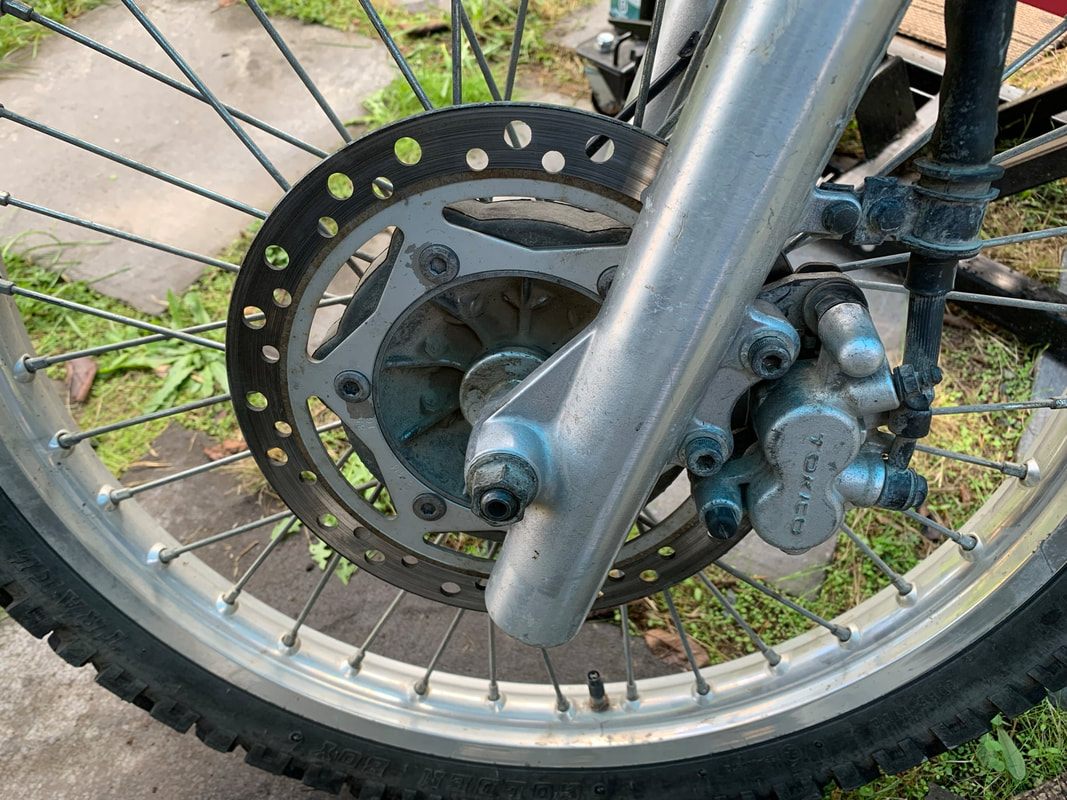
Well, the seal blew out on the Super Sherpa rear brake and the remaining pad was very worn down. Since everything is pressure mounted and held by the pad spring and the piston, I can only assume that the blown seal, piston, and very thin brake pad had managed to allow the pad slip out of position and fall out completely. The piston looks in pretty bad shape, rust and pitting but the rest looks like it will be OK after a good cleaning. On the parts order list is new seals, piston, pads, and brake rotor. I'll do the pads and rotor on the front brake as well.
Well, the seal blew out on the Super Sherpa rear brake and the remaining pad was very worn down. Since everything is pressure mounted and held by the pad spring and the piston, I can only assume that the blown seal, piston, and very thin brake pad had managed to allow the pad slip out of position and fall out completely. The piston looks in pretty bad shape, rust and pitting but the rest looks like it will be OK after a good cleaning. On the parts order list is new seals, piston, pads, and brake rotor. I'll do the pads and rotor on the front brake as well.
|
|
September 30, 2021
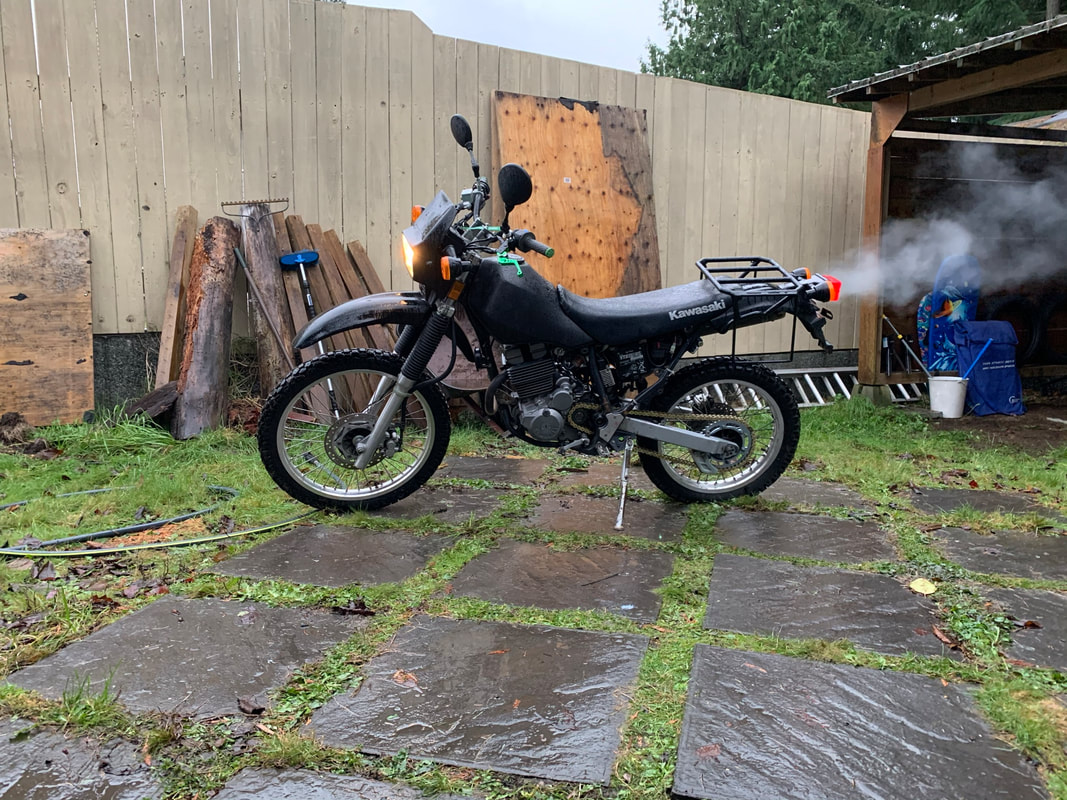
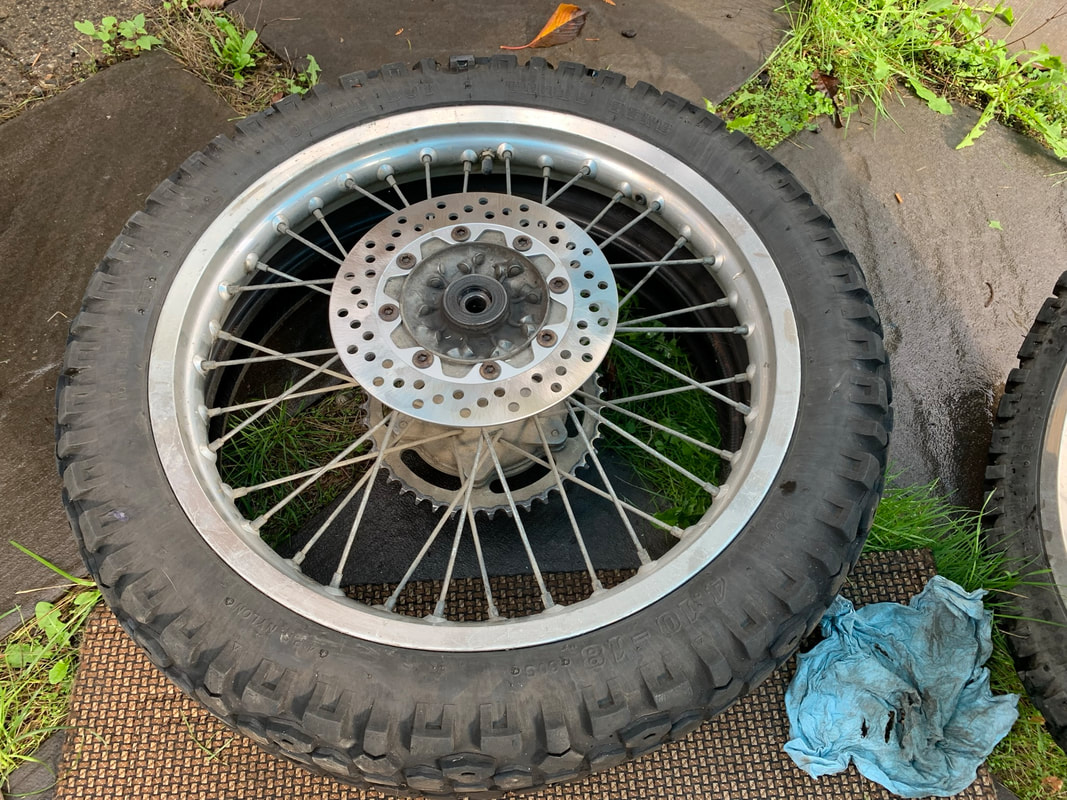
The Super Sherpa is back in action! The rear caliper cleaned up nicely and has been rebuilt with new seals and piston, the front and rear rotors and pads have been replaced and new throttle cables installed for good measure as they were starting to fray at the carburator end.
The Super Sherpa is back in action! The rear caliper cleaned up nicely and has been rebuilt with new seals and piston, the front and rear rotors and pads have been replaced and new throttle cables installed for good measure as they were starting to fray at the carburator end.

|
|
|
|
I took it out for a nice 1 hour ride around town and everything works as it should, which is a good thing!
March 14, 2022
Well, today I said good bye to the mighty Super Sherpa. I sold this bike (along with my Suzuki TU250X) to help fund the next bike. I can't say enough good things about the Sherpa in general, it's a fantastic, light weight, easy to ride dual sport. I'm looking to move up to a larger dual sport that will be suitable for longer dual sport camping trips. Perhaps a DR650?
Well, today I said good bye to the mighty Super Sherpa. I sold this bike (along with my Suzuki TU250X) to help fund the next bike. I can't say enough good things about the Sherpa in general, it's a fantastic, light weight, easy to ride dual sport. I'm looking to move up to a larger dual sport that will be suitable for longer dual sport camping trips. Perhaps a DR650?